


What is the best tarp for a roof is one of the first questions homeowners ask when water starts coming in after a storm. And it makes sense. According to FEMA, temporary roof covers like tarps are among the most common emergency measures used after severe weather to prevent interior damage and mold growth. But here’s the problem: choosing the wrong tarp often creates new leaks instead of stopping them.
Have you ever noticed how two homes can use tarps after the same storm, yet one stays dry while the other keeps leaking? That’s not luck. It usually comes down to three things most guides barely explain: size, thickness, and proper fit. When any of these are wrong, wind lifts the tarp, water sneaks underneath, and the damage quietly gets worse.
Roofing specialists see this every storm season, especially in areas with strong winds and heavy rain like Central Florida. A tarp can buy you time, but only if it’s chosen and installed the right way.
Otherwise, you’re just delaying repairs while risking higher costs later. In this guide, you’ll learn how to make the right choice, avoid the most common mistakes homeowners make, and understand when a tarp is enough, and when it’s not.
If your roof is already compromised, this is not the moment to guess. Let’s break it down clearly, step by step, so you can protect your home before the next storm hits.
Table of Contents
What makes one tarp better than another for a roof?
Not all tarps are built for roofs. And that’s where most problems start.
A tarp becomes “better” when it does three things at the same time: blocks water, stays in place, and matches the roof it’s covering. Miss one of these, and the tarp turns into a temporary patch that fails fast, sometimes on the first windy night.
Here’s the hard truth many guides skip: roof leaks don’t come from rain alone. Wind pushes water sideways. Sun weakens materials. Heat builds pressure under loose edges. When a tarp ignores these forces, water finds a way in. It always does.
So what actually separates a good roof tarp from a bad one?
- Coverage that goes beyond the damage, not just over it
- Material strong enough for wind and UV exposure
- A fit that follows the roof’s slope and edges, instead of fighting them
Think of a roof tarp like a seat belt. Any strap looks fine until you need it to hold. On a roof, size, thickness, and fit decide whether that tarp protects your home, or just flaps around making noise.
Roofing crews see this every storm season in Central Florida. Homes with “a tarp on top” still leak because the tarp choice was rushed. Others stay dry for weeks with the right setup. The difference isn’t luck. It’s decision-making.
In the next section, we’ll answer the real question homeowners care about: what is the best tarp for a roof based on real situations, not product labels or marketing promises.
What is the best tarp for a roof based on real situations?
There is no single tarp that works best for every roof. The best tarp depends on what happened, how long you need protection, and what the weather is likely to do next. That’s where many homeowners get stuck. They buy a tarp based on color or price, not on the problem in front of them.
Below are the situations roofing professionals see most often, and what actually works in each one.
Best tarp for emergency roof leaks after storms
When water is already coming inside, speed matters. But speed without the right tarp usually backfires.
For emergency leaks:
- The tarp must extend well past the damaged area in all directions.
- Lightweight tarps tear too easily once wind picks up.
- A heavy-duty poly tarp with reinforced edges is usually the safest short-term option.
This setup is meant to stop active leaks and buy time. It is not a fix. If water keeps dripping after tarping, something underneath is still exposed.

Best tarp for high winds and storm-prone areas
Wind is the real enemy. Rain just follows along.
In high-wind areas like Central Florida:
- Thickness matters more than color.
- Reinforced seams and strong grommets reduce tearing.
- A tarp that fits tight against the roof performs far better than a loose one.
Many failures happen because the tarp acts like a sail. Once wind gets under it, the damage spreads. The right tarp choice reduces lift before installation even begins.
Best tarp for short-term vs longer temporary coverage
How long the tarp needs to stay in place changes everything.
For short-term coverage:
- Heavy-duty poly tarps usually hold up well for days or a few weeks.
For longer temporary protection:
- Thicker materials and UV-resistant coatings become critical.
- Sun exposure breaks down cheap tarps faster than most homeowners expect.
A tarp that works for one weekend may not survive a full month of heat, sun, and afternoon storms. Choosing based on time frame prevents repeat leaks and repeated climbs onto the roof.
The next step is understanding how big the tarp needs to be, because even the right material fails if it doesn’t cover the roof properly.
Roof tarp size: how big should a tarp be to actually work?
This is where most tarp jobs fail.
Many homeowners measure only the visible damage. That’s a mistake. Water rarely enters the roof straight down. Wind drives it sideways, and gravity pulls it under loose edges. A tarp that barely covers the damaged spot almost guarantees leaks will continue.
To work properly, a roof tarp must cover more than the problem area, not just sit on top of it.
How to measure roof damage before choosing tarp size
Start wider than you think you need.
A proper tarp should extend:
- Several feet above the damaged area
- Past both sides of the damage
- Down the roof slope far enough to shed water safely
Covering extra space isn’t wasteful. It’s protection. Roofing crews do this for a reason: water always looks for the easiest path.
Why overlap matters more than most homeowners think
Overlap is what keeps water from sneaking underneath. When rain hits a roof, it flows downward and sideways. If the tarp edge ends too close to the damage, water can slide right under it. Proper overlap creates a natural runoff path, guiding water away instead of trapping it.
Think of it like tucking a sheet under a mattress. If it barely reaches the edge, it comes loose fast. Extra overlap keeps everything in place.
Common sizing mistakes that lead to leaks
Some errors show up again and again:
- Choosing a tarp the same size as the damaged area
- Leaving the top edge too short
- Forgetting that wind-driven rain doesn’t fall straight down
A tarp that is too small doesn’t just fail, it can redirect water into places that were dry before. Size is not a detail. It’s the foundation of temporary roof protection.
Next, we’ll look at tarp thickness and material, because size alone won’t stop leaks if the tarp can’t handle wind, sun, and pressure.
Tarp thickness and material: what really holds up on a roof?
Size gets the tarp in place. Thickness and material decide how long it survives. Most tarps fail not because they were installed wrong, but because they were never built to handle wind pressure, sun exposure, and constant movement on a roof. When that happens, small tears turn into open gaps fast.
For roofing purposes, two materials dominate for a reason: poly tarps and vinyl tarps.
Poly tarps are the most common choice for emergency coverage. They’re lighter, easier to handle, and effective when properly secured. A heavy-duty poly tarp works well for short-term protection, especially right after storms.
Vinyl tarps are heavier and more resistant to tearing and UV exposure. They’re often used when a tarp needs to stay in place longer or when wind is a constant issue. The downside is weight and cost, which can make installation harder for homeowners.
Thickness matters more than color. A thin tarp may look fine on day one, but heat and wind break it down quickly. Thicker tarps resist stretching, reduce flapping, and hold their shape better once tension is applied.
Seams and edges also deserve attention. Reinforced seams and strong grommets spread tension evenly, reducing the risk of ripping when the tarp is tightened. Weak edges are usually the first point of failure.
In short:
- Thin tarps fail faster
- Strong seams last longer
- Material choice should match duration and wind exposure
Next, we’ll cover how all of this comes together with proper fit, because even a thick tarp won’t work if it doesn’t sit right on the roof.
How to make sure a tarp fits your roof properly
A tarp can be strong and well sized, but if it doesn’t fit the roof, problems show up quickly. Roofs aren’t flat surfaces. They have slope, edges, valleys, and wind exposure points. When a tarp ignores those details, it wrinkles, lifts, and channels water where it shouldn’t go.
The goal is simple: the tarp must work with the roof’s shape, not against it. On sloped roofs, the tarp should follow the pitch and allow water to run downward without pooling. When a tarp is pulled too tight across angles or laid flat against a slope, it traps water. That extra weight strains the material and loosens fasteners.
Edges matter just as much. Loose corners are the first places wind attacks. A proper fit keeps edges tight and directs airflow over the tarp instead of under it. When wind slips underneath, the tarp turns into a sail, and sails don’t belong on roofs.
Most fit issues come from rushing:
- Pulling the tarp sideways instead of down the slope
- Ignoring roof angles and ridgelines
- Leaving excess material bunched instead of evenly tensioned
A well-fitted tarp looks boring. No flapping. No bulges. No loose edges. That’s a good thing.
Next, we’ll look at how to secure a roof tarp safely, because fit and fastening always work together, and getting that wrong can cause more damage than the storm itself.
How to secure a roof tarp safely without making damage worse
This is where many homeowners make mistakes without realizing it. Securing a tarp is not about using more nails or pulling it as tight as possible. The goal is simple: control wind, guide water, and protect the roof underneath.
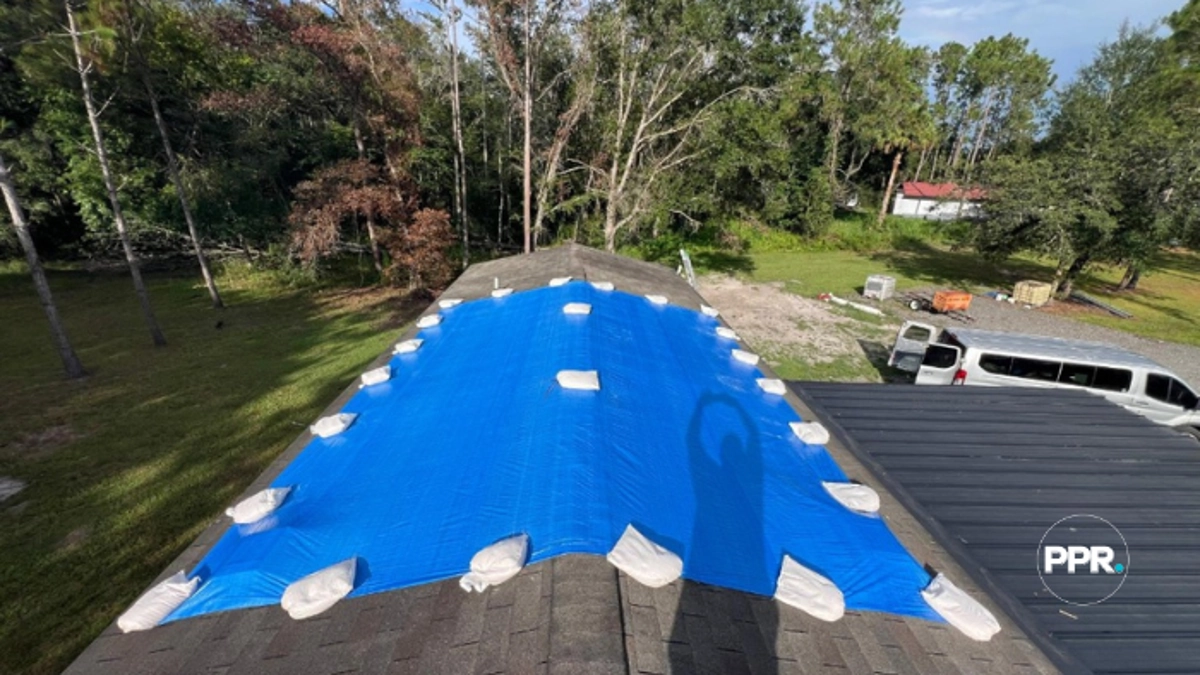
Start with the correct placement
Always secure the tarp above the damaged area first, then work downward following the roof’s slope. This setup allows rainwater to flow over the tarp naturally instead of pushing underneath it. When the tarp fights gravity, leaks usually get worse.
Use tension, not force
The tarp should be snug, not stretched to its limit. Over-tightening puts stress on shingles and decking. When fastening is done wrong, shingles crack, wood gets punctured, and damage spreads beyond the original problem.
Reinforce the edges before fastening
A common professional method is to wrap the tarp edge around wood strips and secure the wood to the roof. This spreads pressure evenly and protects the tarp from tearing. Fasteners driven directly through the tarp without reinforcement usually fail once wind picks up.
Know when to stop
Some conditions turn a simple tarp job into a serious safety risk:
- Wet or steep roofs increase fall risk fast
- Power lines and metal tools are a dangerous mix
- If wind lifts the tarp during installation, it’s no longer safe
A tarp is meant to reduce damage, not create a second emergency. When conditions feel unstable, stepping back is the right call.
How long can a tarp stay on a roof before problems start?
A tarp is a temporary shield, not a long-term solution. The trouble begins when “temporary” quietly turns into weeks or months.
Most roofing specialists agree on this point: the longer a tarp stays in place, the higher the risk underneath. Heat, moisture, and constant movement slowly break down both the tarp and the roof materials below it. In warm, humid areas like Central Florida, that process speeds up.
In many cases, a properly installed tarp can hold for several days or a few weeks. Beyond that, problems start to appear—not always where you can see them.
Here are common warning signs:
- The tarp begins to sag or flap during wind
- Water stains grow instead of disappearing
- Moisture gets trapped, creating the perfect setup for mold
- Fasteners loosen as materials expand and contract
Sun exposure is another factor homeowners underestimate. UV rays weaken tarp coatings over time, making small tears spread faster. Once water starts pooling or slipping underneath, the tarp stops protecting and starts hiding damage.
There’s also a practical risk. The longer a tarp stays up, the more likely homeowners postpone inspection and repair. That delay often turns a manageable fix into a larger repair job later. A tarp buys time. It does not stop the clock.
When a tarp is not enough and roof repair becomes necessary
A tarp can slow water down, but it cannot stop structural damage once it starts spreading beneath the surface. When leaks continue after proper tarping, it’s usually a sign that water is entering through areas the tarp cannot seal.
Over time, moisture trapped under a tarp weakens roof components. Shingles lose their hold. Wood absorbs water. Small issues quietly grow while the tarp hides what’s happening underneath. This is why repeated adjustments or replacing one tarp with another rarely solves the problem.
In many cases, homeowners notice stains appearing in new spots or feel soft areas developing on the roof deck. At that point, the damage is no longer limited to the original leak. The roof needs to be inspected and repaired at the source, not covered again.
Temporary protection has its place. But once a tarp stops improving the situation, continuing to rely on it only increases repair costs later. That’s when roof repair becomes the safer and more effective step forward.
Roof tarp solutions for homes in Orlando and Central Florida
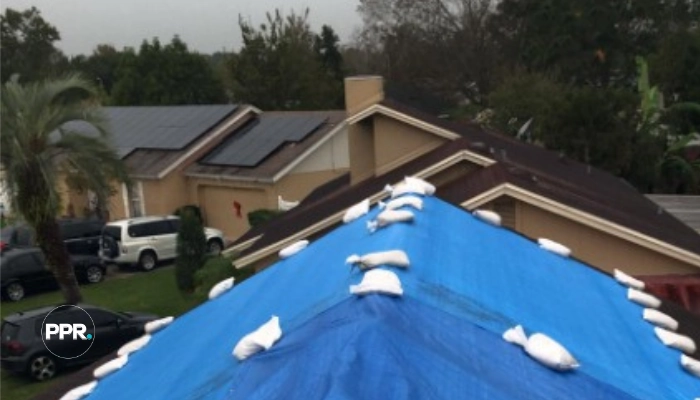
Homes in Orlando and across Central Florida face a different kind of pressure when it comes to roof tarping. Storms arrive fast. Wind shifts direction. Heat and humidity don’t give materials much of a break. These conditions shorten the lifespan of temporary roof covers and make proper tarp selection even more important.
In this region, tarps are often used after sudden storms while homeowners wait for inspection or repairs. That window matters. Strong sun exposure can weaken materials faster, and afternoon rain can find small gaps that would stay dry in cooler climates. A tarp that fits well and is secured correctly can hold during this period. A poor setup usually fails early.
Local roofing crews plan around these patterns. They expect wind-driven rain, rapid temperature changes, and repeated storm cycles. That’s why temporary solutions must account for more than just water resistance. Fit, anchoring, and material strength all play a role in keeping homes protected between storms.
For homeowners in Central Florida, tarping should always be viewed as a short-term step within a larger roof protection plan. Understanding local weather behavior helps prevent repeat damage and reduces the need for ongoing emergency fixes.
Final thoughts: choosing the right tarp before damage gets worse
Choosing what is the best tarp for a roof is less about finding a perfect product and more about making the right decision at the right moment. Size, thickness, and fit are what separate a tarp that protects your home from one that only looks like it does.
A well-chosen tarp can stop active leaks, reduce interior damage, and buy valuable time after a storm. A poorly chosen one can trap moisture, lift in the wind, and quietly make repairs more expensive. That difference often comes down to details most homeowners are never told.
If your roof needed a tarp, it’s already telling you something. Temporary protection works best when it’s followed by a proper inspection and a clear plan. Waiting too long or guessing the next step usually leads to repeat leaks and higher costs later.
Protect Preserve Roofing helps homeowners across Orlando and Central Florida assess roof damage, secure temporary protection when needed, and move forward with repairs the right way.
How thick should a tarp be for roof protection?
For roof use, thicker tarps perform better. Lightweight tarps tear easily once wind and tension come into play. In most emergency situations, a heavy-duty tarp with reinforced seams offers more reliable short-term protection, especially during storms or repeated rain.
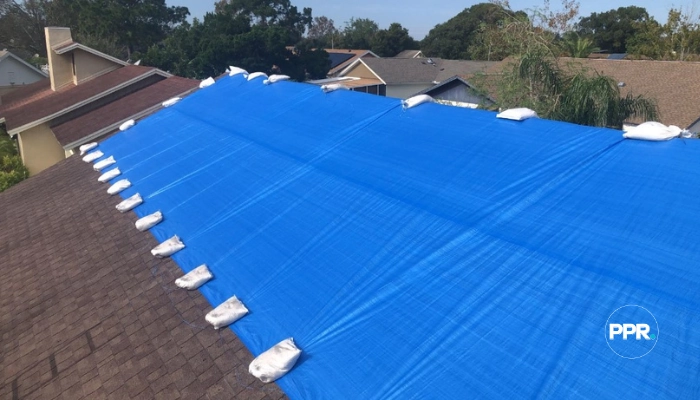
Is a blue tarp good enough for a damaged roof?
A blue tarp can work for short-term emergencies if it’s properly sized and secured. However, thinner blue tarps break down faster under sun and wind. They are best used as temporary coverage, not as a long-lasting solution.
How do you keep a roof tarp from blowing off?
Proper sizing and anchoring matter more than extra fasteners. The tarp should extend well beyond the damaged area, follow the roof slope, and be secured evenly to prevent wind from getting underneath. Loose edges are the most common reason tarps fail.
Can a roof tarp prevent mold and interior damage?
A tarp can reduce water intrusion, but it does not eliminate moisture risks. If water gets trapped underneath or repairs are delayed too long, mold and interior damage can still develop. That’s why tarps work best when followed by inspection and repair.


Leave a Reply