


“What can I use to cover a leaking roof?” it’s not just a question, it’s often a desperate cry for help from homeowners watching water invade what should be their safest place. A leaking roof can go from a minor nuisance to a full-blown disaster before you even realize it. There’s more, if you’re reading this, chances are you’re already feeling that panic rise as water seeps into your home, threatening your peace.
According to the Insurance Information Institute, water damage is responsible for nearly 29% of all home insurance claims in the U.S., and roof leaks are among the top culprits. Even a small delay in addressing the issue can cost you thousands, not just in repairs, but also in denied claims if you don’t act properly.
That’s why, in this guide, you’ll learn what works best, what to avoid and how to make sure your emergency fix doesn’t turn into an insurance nightmare. Plus, we’ll show you how Protect Preserve Roofing helps Florida homeowners every day.
If you’ve got a leak, don’t wait. This guide was built to help you act now and smart. Let’s get to it.
Table of Contents
Why It’s Crucial to Cover a Leaking Roof Immediately
Water finds the fastest way into your home and starts damaging everything it touches: insulation, wood, drywall, wiring and sometimes your peace of mind. According to FEMA, just one inch of water can cause more than $25,000 in property damage and that’s not from a flood; that’s from any form of intrusion, including from above.
So, what really happens if you leave a leak exposed?
- Mold grows within 24 to 48 hours. It spreads fast and hits your health.
- Wood starts rotting, which weakens your roof structure from the inside out.
- Your ceiling can sag and collapse (yes, even with just a slow drip).
- Your home’s electrical system may short out, leading to serious fire risks.
Quick reminder: Protect Preserve Roofing helps homeowners like you every day in Florida. We arrive fast, cover leaks professionally and document the situation to protect your insurance claim. Don’t wait for the rain to stop. Protect your home now and your wallet later.
What Can I Use to Cover a Leaking Roof?
When a roof leak hits, you need a fix, but here’s the million-dollar question: what can you actually use to cover a leaking roof right now? Let’s break it down, straight to the point.
Blue roof tarps
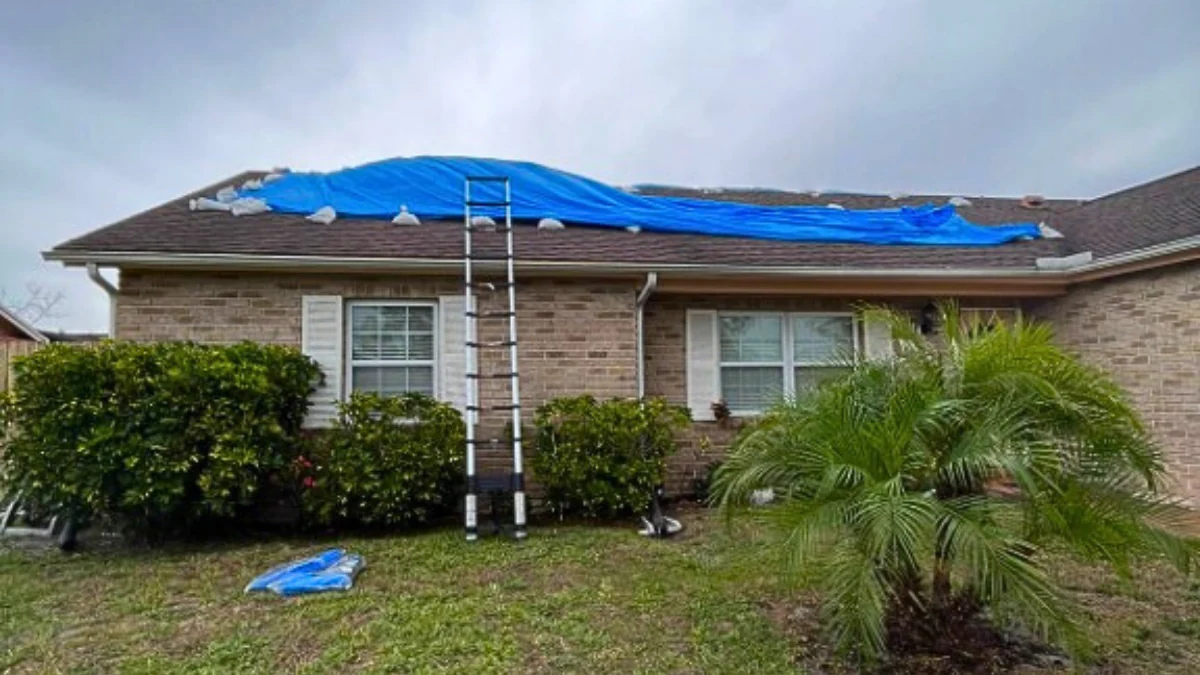
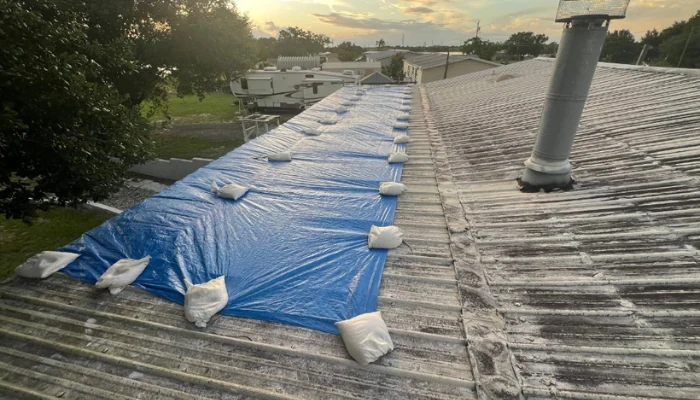
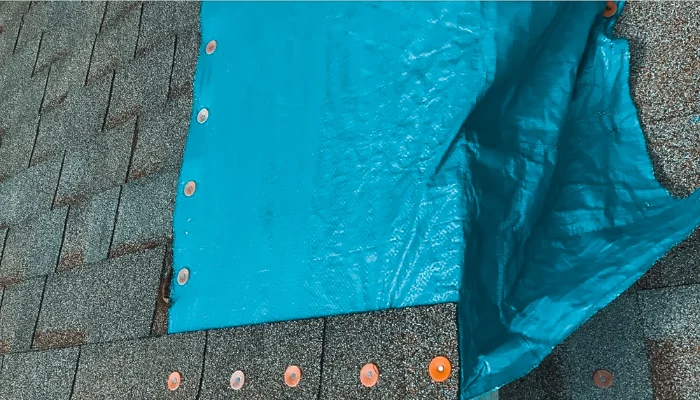
If you’re looking for the most effective temporary cover, go with a heavy-duty blue tarp. It’s waterproof, wind-resistant and made to hold up under pressure. When installed properly (without nails), a tarp can protect your roof for days or even weeks and months.
Pro tip from Protect Preserve Roofing: Never nail a tarp unless your roof is dangerously steep or structurally compromised. Doing so can cause more damage and may void your insurance claim.
Plastic sheeting or poly film
For smaller leaks or interior protection, plastic sheeting (like 6-mil polyethylene film) can buy you time. It won’t hold up to heavy wind or rain outside, but it helps inside if water is dripping through your ceiling.
- Tape it to the attic ceiling.
- Direct the water into a container.
- It’s a short-term bandage, not a shield.
Roofing tape or sealant patches
Some leaks – like around skylights or vents – can be temporarily sealed using roofing tape or a self-adhesive patch. This option works best when:
- The surface is dry (or close to it).
- The damage is isolated and minor.
- You can safely access the area.
Important reminder: They won’t last long under heavy rain, but they might stop a leak for a night or two.
Plywood boards
If debris has created a hole – like from a fallen branch – and you’re waiting for help, plywood can act as a barrier:
- Place it gently over the damaged area.
- Weigh it down, never nail it.
- Then cover with a tarp.
What you should not use
Some items might seem like good ideas, but they’re not built for the job:
- Canvas tarps: absorb water and mold easily.
- Duct tape: weak adhesion, especially wet.
- Car covers or drop cloths: not weatherproof.
Pro tip: The right material depends on the type of leak, the weather and your roof’s pitch. If in doubt, don’t go up there, especially if it’s wet or dark. A temporary solution isn’t worth a permanent injury.
How to Cover a Roof Leak with a Tarp
Covering a roof leak with a tarp might sound simple, but if done wrong, you could make the leak worse, cause injuries or mess up your insurance. Here’s how to do it right and safely.

Before you climb up there, read this:
- Never go on the roof during a storm. Wet shingles = slippery death trap.
- Avoid climbing in the dark. If you can’t see it, don’t step on it.
- Use a safety harness if you must go up and always have someone assist from below.
- You’ll need a: heavy-duty blue tarp (big enough to extend past the damage), sandbags, 2x4s, or secure weights (no nails or screws), utility knife or scissors, ladder and gloves.
Step-by-step: how to tarp your roof safely
- Find the leak source: Trace the water back from inside your attic or ceiling and identify the exact area on the roof if safe to access.
- Clean the area: Remove any loose debris or shingles. A clean surface helps the tarp stay in place longer.
- Lay the tarp flat: Stretch the tarp over the damaged spot and make sure it extends at least 3–4 feet beyond the leak in every direction.
- Secure without nails: Use sandbags or long 2x4s wrapped in the tarp edges to weigh it down. Place weights along the edges, not just the center.
- Double check stability: Tug lightly on the tarp to test its hold. If wind lifts it too easily, add more weight (never nails).
When (and Why) You Should Never Nail a Tarp on Your Roof
As for “What can I use to cover a leaking roof,” if you have a leaky roof and a tarp on hand, it may seem tempting to grab a hammer and start nailing things down. It’s already there and you know it can be used. Furthermore, this is the hard truth: nailing a tarp is one of the fastest ways to make your roof problem worse and potentially lose your insurance coverage in the process.
Why you should avoid nails at all costs
Let’s break it down:
- Nails create more holes. Sounds obvious, right? But once you drive that nail through the tarp and into your shingles, you’ve added extra entry points for water.
- Tarps shift with wind. Nails don’t. That movement causes stress around the nail hole. Over time, it tears the material and expands the damage, sometimes in less than 24 hours.
- You could void your insurance claim. Many policies clearly state: “The homeowner must take reasonable action to prevent further damage”. Nailing through your own roof? That’s not reasonable.
The only situations where nails might be used
There are two rare and specific cases where a tarp may need to be nailed:
- Extremely steep roof pitch (over 8/12). Sandbags can’t stay put on a steep slope. In this case, a secure frame might require minimal, controlled fastening, preferably to wood framing, not shingles.
- Roof is completely compromised. If a tree went through the roof or sections are missing, a nailed tarp might serve as a temporary stabilizer. Even then, it should be done by professionals who can document the damage.
In both cases, your insurer should be notified, and every step should be photographed to prove necessity, no guesswork.
The better way: weights, not nails
Protect Preserve Roofing uses (and recommend) a no-damage system based on:
- Industrial-grade sandbags and boards.
- Precise placement for wind resistance.
- Techniques accepted by most Florida insurers.
We don’t drill or guess, and we are fast. In most areas, we show up within an hour of your call. If you’re not trained and insured to climb and tarp safely, don’t risk your roof or your back.
What Can I Use to Cover a Leaking Roof: Damage vs. Covering Method
Not every roof leak is the same and not every damage calls for the same fix. Choosing the right method to cover a leaking roof depends on the type of damage, the urgency and how much you can safely handle.
To make it easier, here’s a quick reference table that shows which materials or actions work best in common roof damage situations.
| Damage Type | Best Temporary Cover | Requires a Pro? | Notes |
| Missing shingles | Blue tarp with sandbags | Not always | Avoid nails. Cover at least 3 feet around the damaged area. |
| Small puncture or hole | Roofing tape or tarp | Optional | Tape works only if the surface is dry. Tarp adds longer protection. |
| Large tree impact | Tarp + plywood + sandbags | Yes | Do NOT climb. Call a pro. Structure may be unstable. |
| Chimney or vent flashing leak | Roofing patch or sealant | Possibly | Temporary fix only. Flashing issues usually need pro inspection. |
| Water stain but no visible hole | Plastic sheeting inside attic | No | This buys time if you can’t locate the leak yet. |
| Roof slope over 8/12 | Tarp with secure anchor system | Always | Sandbags may not hold. Needs expert setup — possibly nailed under boards. |
Quick reminder: If you’re staring at water damage but unsure what to use or where it’s coming from, you’re not alone. Instead of guessing (or Googling for hours), call Protect Preserve Roofing.
What NOT to Do When Covering a Leaking Roof
Covering a roof leak in a rush? That’s fine. However, doing it wrong can make everything worse. Here’s what not to do if you want to avoid more damage, denied insurance or even a hospital visit:
- Don’t climb a wet roof: Wet shingles are slick like ice. One wrong step and you’re off the edge. Unless you’re trained, geared up and have someone assisting you, stay off the roof.
- Don’t use nails or screws: Nails create new holes and screws tear shingles. Both can lead to leaks worse than the original and can void your home insurance claim.
- Don’t use duct tape or trash bags: These aren’t waterproof under real pressure.
Rain, heat or wind? They’ll fall apart. What looks like a creative fix becomes a soaked ceiling by morning. - Don’t leave the edges exposed: Even with a tarp, if you don’t cover past the damaged area, water will find its way in. Tarps must extend at least 3–4 feet beyond the damage in every direction and be weighed down properly.
- Don’t ignore the leak until morning: Leaks don’t wait for sunrise. Mold can start forming in under 48 hours and if your insurance sees signs of negligence, they may refuse coverage.
Pro tip: Always use a heavy-duty tarp with sandbags or wood boards, stay off the roof if it’s raining or dark and call the pros can handle it the right way.
How Much Does a Professional Tarp Installation Cost?
Let’s be honest, roof emergencies are stressful enough without worrying about unexpected costs and you don’t just want the answer to “what can I use to cover a leaking roof”, you want to know the price. So, straight to the point: the typical cost to professionally install a roof tarp is between $800 and $1,600.
This price isn’t pulled from thin air, it’s based on real conditions and standard Florida market ranges. It also reflects the rates used by Protect Preserve Roofing, a trusted provider in emergency tarp services across the state.
What affects the price?
Several factors determine whether you land closer to $800 or $1,600. Here’s what matters:
- Size of the damaged area. Larger leaks mean larger tarps and more time and materials to secure them properly.
- Roof pitch and height. A two-story home with a steep slope? That’s more dangerous and requires more setup and safety gear.
- Accessibility. If the leak is in a hard-to-reach spot (like behind chimneys or under solar panels), expect a bump in the rate.
- Weather conditions at time of install. Working during a storm or right after heavy rain raises risk and may increase labor cost.
What’s included in the price?
It’s typically covered:
- Tarp (heavy-duty, waterproof, wind-resistant).
- Labor by experienced professionals.
- Sandbag or weighted securing system (not nails).
- Full photographic documentation for insurance.
- Fast response.
Why paying less could cost more
Some DIY services or freelancers might offer a tarp install for $300–$500 (less or more). But here’s what they may not tell you, they:
- Use thin tarps that rip with wind.
- Nail into your shingles, which voids warranties and insurance claims.
- Often skip documentation, leaving you in a bind when it’s time to file.
When the tarp blows off or leaks again? You pay more to fix what should’ve been done right the first time. That’s why you need a clean, secure and fast job.
Conclusion: Why Hiring a Pro Like Protect Preserve Roofing Makes a Difference
Every minute that water seeps through your ceiling, it’s chewing away at your home’s structure, raising the risk of mold, electrical hazards and insurance headaches. In this scenario, a tarp is really your first line of defense against thousands of dollars in damage.
Just ask yourself: Is it worth gambling with your home to save a few bucks? Keep in mind that Protect Preserve Roofing does the job right, that’s why Florida homeowners trust us, we:
- Never nail or screw tarps, unless necessary.
- Respond fast.
- Our team is trained to install covers that don’t void your claim.
- Offer clear pricing, ranging from $800 to $1,600, based on real damage and pitch conditions.
- Provide photos and documentation for easy insurance submission.
You’ve already got enough to deal with, don’t let a leaky roof add to the list. One call and the leak is stopped, the risk is handled, and your home is back under control. You can also get a quick estimate to prevent or repair damage, or even schedule a free visit to your roof.
Need help now? We are is standing by to secure your roof fast, safe and done right the first time.


Leave a Reply