


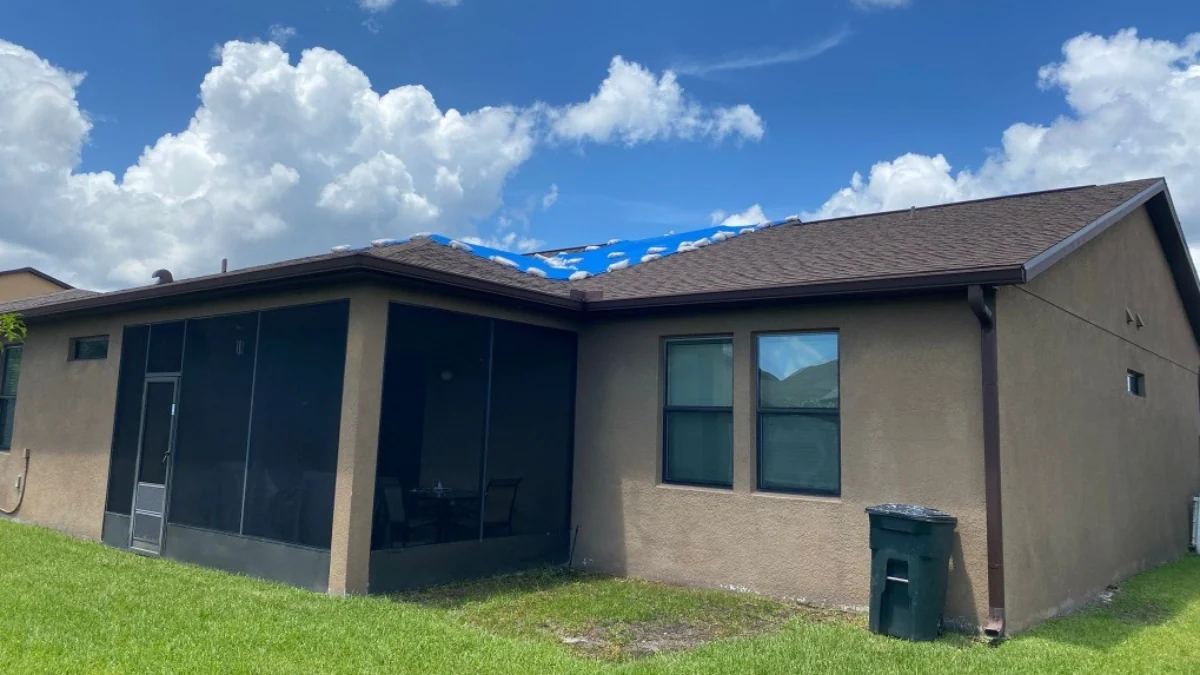


What size tarp do I need for my roof? According to data from the National Storm Damage Center, over 1.3 million U.S. homes suffer roof damage each year due to severe weather, most of it concentrated in states like Florida, where heavy rains and hurricanes are frequent. Yet, what most people don’t realize is that choosing the wrong tarp size can cost thousands in secondary water damage.
If you’ve ever stared at a blue tarp wondering if it’s big enough to cover that leaking section, you’re not alone. Many homeowners face the same dilemma, often during emergencies when every minute counts. The key is not just grabbing any tarp off the shelf, but understanding how to measure, size, and secure it correctly for your specific roof type.
That’s why, in this guide, you’ll discover how to calculate your exact roof tarp size step by step, the difference between standard, heavy-duty and custom-size tarps, why FEMA tarp sizes might not always fit your situation and when it’s smarter – and safer – to call a roofing expert.
Don’t wait until the next downpour catches you off guard. Let’s find out instantly what size tarp your roof really needs and how to secure it right the first time.
Table of contents
Understanding Roof Tarp Sizes: The Basics You Must Know
Choosing the right tarp starts with knowing how they’re measured, what the standard dimensions mean and how different factors like roof shape and slope come into play.
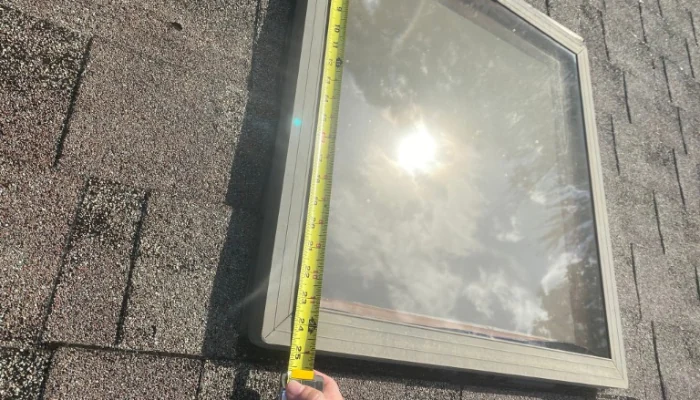
So, a roof tarp is measured in feet, but manufacturers often list two numbers: the cut size (before hemming and grommets) and the finished size (the actual coverage area). That difference might seem small. However, losing a few inches on each side can mean the tarp doesn’t fully protect your damaged section. For example, a tarp labeled 20×30 ft might actually cover about 19×29 ft once edges are reinforced.
In Florida, where heavy rain and high winds can strike with little warning, understanding these measurements matters. A tarp that’s even a few feet too small can let water seep under the edges, causing mold and ceiling damage before the storm passes.
Standard tarp sizes and what they actually cover
Most stores sell standard sizes ranging from 10×12 ft for small patches to 30×40 ft or larger for full sections of roofing. To make this easier:
- 10×12 ft: Small leaks or single shingle damage.
- 20×30 ft: Medium roof areas or partial coverage.
- 30×40 ft: Larger homes or severe storm exposure.
The average tarp size used for temporary roof protection in Central Florida is around 20×30 ft, but that number changes depending on your roof’s design and pitch. If your home has a steep roof, you’ll need more material to wrap and secure the tarp safely.
Why roof pitch and shape matter
A flat section of roof needs less coverage than a steep one. The steeper the pitch, the more the tarp must extend to cover the surface completely and allow for overlap. Think of it like wrapping a gift: the sharper the angles, the more paper you need.
- Low slope (2:12 – 4:12): Minimal extra coverage.
- Moderate pitch (5:12 – 7:12): Add 3–4 feet of overlap.
- High pitch (8:12+): Add at least 5–6 feet of overlap on all sides.
Don’t forget: The goal isn’t just to “cover the hole.” You want a tight, sealed barrier that diverts water away from vulnerable areas without trapping moisture underneath.
Choosing the right material
While blue tarps are the most common and affordable, not all are made equal.
- Blue Tarps: Lightweight, short-term use (about 90 days).
- Heavy-Duty Tarps: Thicker weave, UV protection, better for wind resistance.
- Custom Size Tarps: Ordered to exact dimensions, useful for large or complex roofs.
Heavy-duty and custom-size waterproof tarps are a smart choice in Florida’s climate, where tropical storms can test every fastener. FEMA recommends using tarps rated at 250 GSM or higher (grams per square meter) for durability and weather resistance.
Quick reminder: Protect Preserve Roofing uses only construction-grade, heavy-duty tarps for emergency roof protection. Our team inspects the roof, measures the damage and installs the tarp using secure, insurance-approved methods, never by nailing or screwing directly into the roof surface, which can void coverage and worsen damage.
How to Calculate the Right Roof Tarp Size (Step-by-Step Guide)
When your roof is leaking and the rain won’t stop, you need a quick way to get the numbers right fast. This section breaks it down into five simple, foolproof steps you can follow before buying or scheduling a professional tarp installation.
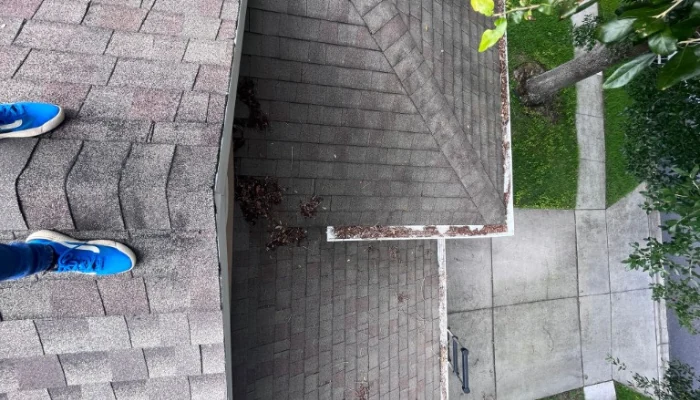
- Step 1. Identify the damaged area: Start with a visual check from the ground if possible. Look for missing shingles, lifted flashing, or debris marks that reveal where water is getting in. If you can safely access the attic, check for wet insulation or visible light through the decking, that pinpoints the leak.
- Pro tip: Never climb on a wet or unstable roof. A small inspection error can turn into an accident. Our licensed team can inspect and tarp your roof safely within two hours of your call in most Central Florida areas.
- Step 2. Measure the width and length of the affected section: Use a tape measure, laser distance tool or even reference points to estimate. Multiply the number of shingles in width by 1 ft if using standard shingles. Example: If the damaged section is about 12 ft wide and 16 ft long, you have roughly 192 square feet of exposed roof.
- Step 3. Add overlap for wind and water protection: You need extra tarp coverage to keep rain from getting underneath. Add at least:
- 4 feet on each side for standard roofs.
- 6 feet or more for steep or complex roofs.
- Step 4. Consider the roof pitch (slope): Roof pitch affects how much tarp surface you’ll need. A steeper roof means more surface area to cover. Here’s a simple way to calculate it:
- Low slope (2:12 – 4:12): add 10% extra length and width
- Moderate pitch (5:12 – 7:12): add 20%
- High pitch (8:12 or more): add 30%
Don’t forget: If your roof section is 20 ft long on the ground and has a 6:12 pitch, multiply 20 x 1.2 = 24 ft actual coverage needed along the slope.
- Step 5. Choose your material strength: Once you have the measurements, pick the material that fits your timeline and weather conditions:
- Light-Duty (Blue Tarps): short-term use, light rain protection.
- Heavy-Duty (Silver/Green): UV protection, wind resistance, extended use.
- Custom Tarps: for unique roof shapes or when full coverage is required.
Pro tip: Heavy-duty tarps rated 250 GSM or higher are recommended in Florida’s climate. They can resist strong winds, heat and UV damage far better than thin plastic tarps.

Important installation reminder
- Do not nail or screw the tarp directly into the roof. It can cause further leaks and void your insurance coverage.
- Use boards, sandbags or weighted anchors instead.
- Ensure water runs over the tarp, not under it, direct the flow toward gutters or downslopes.
Protect Preserve Roofing uses FEMA-grade tarps, installed with wind-rated fastening methods approved by major insurance carriers. We make sure your roof is protected properly, not just covered. Request your on-site assessment now at protectpreserveroofing.com/build-price-form.
Types of Roof Tarps and Their Recommended Uses
Not all tarps are created equal. The color or texture might look the same from a distance, but the material, thickness and strength determine how long it will hold up against Florida’s unpredictable weather. Below is a clear comparison table:
| Tarp Type | Material & Strength | Lifespan (Approx.) | Best Use Case | Advantages | Limitations |
| Blue Tarp | Lightweight polyethylene, ~120 GSM | 1–3 months | Short-term emergency coverage after storms | Affordable, easy to find, quick setup | Tears easily in wind, poor UV resistance, not suitable for long-term use |
| Silver / Heavy-Duty Tarp | Reinforced polyethylene or PVC, 200–300 GSM | 3–6 months | Strong storms or hurricane season protection | UV resistant, wind resistant, durable in harsh weather | Heavier, requires secure fastening (sandbags or boards) |
| Green or Brown Tarp | Medium- to heavy-duty polyethylene, 150–250 GSM | 3–5 months | Moderate roof repairs or partial coverage | Blends with surroundings, water and UV resistant | May stretch or sag over time |
| FEMA-Grade Tarp | Heavy-duty reinforced fabric, minimum 250 GSM | Up to 6 months | Post-disaster roof protection (approved by insurers) | Weatherproof, fire-retardant, used by emergency response teams | Higher cost, limited availability |
| Custom-Size Waterproof Tarp | Tailor-made PVC or canvas blend (built to exact roof measurements) | 6–12 months | Complex roof shapes or large properties | Exact fit, highest durability, resists tearing | More expensive, requires professional installation |
| Mesh Tarp | Polyethylene or vinyl mesh | Seasonal use only | Ventilated coverage or temporary shading | Allows airflow, prevents heat buildup | Not waterproof, unsuitable for active leaks |
Quick guide: which roof tarp is right for you?
- Minor Leaks or Small Storm Damage: Blue tarp (short-term, fast install).
- Moderate Damage or Extended Coverage: Heavy-duty silver or green tarp.
- Severe or Widespread Roof Damage: FEMA-grade tarp (best for insurance-compliant protection).
- Complex Roofs or High-Pitch Structures: Custom-size waterproof tarp.
- Ventilated Areas (porches, patios, sunrooms): Mesh tarp (not for rain protection).
Material quality and weight (GSM)
The durability of any tarp comes down to its GSM, grams per square meter. Here’s a quick rule of thumb:
- 120–150 GSM: Light-duty, short-term (blue tarp).
- 200–250 GSM: Heavy-duty, storm protection.
- 250+ GSM: FEMA-grade or custom-built long-term protection.
A tarp with higher GSM will last longer and resist tearing in Florida’s strong winds. It’s also more UV resistant, a must under the Central Florida sun.
Installation and safety tips
- Always use sandbags, weighted boards or tie-down ropes to secure tarps.
- Avoid any nails or screws, which can puncture the roof and void insurance coverage.
- Overlap edges by at least four feet on each side to prevent rain from seeping underneath.
- If your roof pitch is steep or the damage is large, call professionals instead of attempting a self-install.
Quick reminder: Protect Preserve Roofing uses FEMA-approved tarping materials rated above 250 GSM, installed with techniques accepted by major insurance carriers for post-storm protection. Each installation is performed by our licensed Florida roofing team, ensuring safety and compliance with Florida Building Code.
Avoid These Common Roof Tarp Mistakes
Let’s walk through the most common roof tarp mistakes homeowners make, why they matter and how to avoid them altogether.
- Choosing a tarp that’s too small: A tarp that barely covers the damaged section leaves edges exposed, allowing water to creep underneath. Even a few inches uncovered can cause insulation damage, drywall stains and mold growth within days.
- How to avoid it: Measure the damaged area and always add at least 4–6 feet of overlap on each side. When in doubt, size up; you can always fold the excess, but you can’t stretch a tarp that’s too short.
- Forgetting to account for roof pitch: If you measure your roof from the ground, you’ll underestimate how much material you need. The steeper the pitch, the more surface area the tarp must cover.
- How to avoid it: Add 10–30% more coverage depending on your roof’s slope. If you’re not sure how to calculate it, use a pitch chart or let our team measure it for you during a free on-site assessment.
- Nailing or screwing through the tarp: Nails and screws create holes that defeat the purpose of the tarp and often void your insurance coverage. Worse, they can damage shingles or decking, leading to more repairs later.
- How to avoid it: Use sandbags, weighted boards or ropes instead. Secure the edges by tucking or wrapping them under roof features. This prevents lift during high winds without penetrating the surface.
- Ignoring wind direction: Florida storms don’t hit straight on, they swirl and shift. If your tarp isn’t aligned properly, wind can lift it like a sail. Once that happens, the tarp tears, rain gets underneath and you’re back where you started.
- How to avoid it: Always install tarps so the longest edge runs parallel to the roof ridge and make sure the overlap faces away from the prevailing wind. That way, the wind pushes it tighter instead of lifting it.
- Letting water pool on top: A single gallon weighs about eight pounds. Multiply that across a few square feet and you’re putting serious strain on your roof structure. Over time, this can cause sagging or even collapse.
- How to avoid it: Ensure the tarp is tight and sloped for drainage. Use boards underneath the edges to lift low spots, directing water toward the gutters.
- Leaving the tarp too long: Leaving one in place for months can trap moisture, attract mold and weaken the roof deck beneath it.
- How to avoid it: Replace or repair your roof as soon as conditions allow. Heavy-duty tarps are rated for about 90 days, while FEMA-grade materials can last up to six months, but only when installed correctly and maintained.
- Trying to do it alone on a steep roof: Slippery surfaces, high winds and unstable ladders make it risky even for professionals.
- How to avoid it: If your roof has a pitch over 6:12, call a licensed roofing contractor. Protect Preserve Roofing can typically respond within two hours for emergency tarping across Orlando and Central Florida. Safety first always.
Avoiding these mistakes not only protects your home but can also make the difference between a quick insurance approval and a denied claim.
Need professional help securing your roof after a storm? Visit protectpreserveroofing.com/build-price-form to schedule an emergency tarp installation with our licensed Florida roofing team. We respond 24/7 anywhere in Central Florida.
Maintenance and Replacement Tips
A roof tarp is your home’s temporary armor, strong enough to hold back wind and rain, but not built to last forever. Its lifespan depends on the material, weather conditions and how it’s installed. Florida’s heat, humidity and storms can shorten that life fast, so knowing when to maintain or replace your tarp makes all the difference between protection and new damage. Let’s take a look:
| Tarp Type | Typical Lifespan (Florida Conditions) | Maintenance Frequency | Notes |
| Blue Poly Tarp (Light-Duty) | 30–90 days | Inspect weekly | Meant for short-term use; deteriorates fast under UV light |
| Silver / Heavy-Duty Poly Tarp | 3–6 months | Check every two weeks | Strong UV resistance and better wind hold; ideal for extended coverage |
| FEMA-Grade / Reinforced Fabric Tarp | 6+ months | Monthly inspection | Designed for disaster recovery; water, wind and fire-resistant |
| Custom PVC or Canvas Tarp | 6–12 months | Monthly inspection | For large roofs or custom fits; most durable and weatherproof |
What shortens a tarp’s life
Florida’s tropical weather is rough on temporary materials. These are the biggest factors that wear a tarp down faster than expected:
- Direct sunlight: UV rays weaken plastic fibers and cause tearing.
- Strong winds: Flapping corners stretch or rip grommets.
- Pooling water: Adds weight and pressure on seams.
- Poor fastening: Nails or screws create tears and leaks.
- Long-term exposure: Mold and dirt accumulate under edges.
Even heavy-duty tarps degrade over time. Once you notice fading color, brittleness or tearing at the corners, it’s time to replace it, not patch it.
How to maintain a roof tarp
Keeping a tarp in good condition doesn’t take long, but consistency matters.
- Inspect weekly (or after every storm): Walk around your property and check for loose edges, sagging spots or flapping sections. Look for small tears or fraying seams.
- Remove standing water: Use a broom or long pole to push off any water pooling on top. Avoid climbing on the roof, you can damage shingles or slip easily.
- Tighten tie-downs and weights: Make sure sandbags or boards are still holding securely. Replace any torn rope or straps.
- Keep gutters clear: A tarp can redirect water toward the gutters; clogged downspouts cause backflow that seeps under the tarp’s edge.
- Replace when necessary: No tarp is meant to be permanent. Once it loses tension or shows visible wear, replace it immediately to prevent hidden leaks.
When to replace a roof tarp
- It’s been on your roof for more than three months (blue tarp) or six months (heavy-duty/FEMA tarp).
- The edges have started to curl, crack or tear.
- You notice discoloration, mold growth or sagging.
- The tarp no longer feels tight and windproof.
If you’re unsure, call a roofing professional for a quick assessment. A trained inspector can tell whether your tarp is still protecting your home or silently letting water in.
Important reminder: Never reuse a tarp that has already been exposed to heavy winds or UV damage, even if it looks fine. Micro-tears can lead to new leaks. Always store unused tarps in a dry, shaded area, folded neatly to prevent cracking.
When to Call a Professional Roofer
There’s a point where a tarp is no longer enough and knowing when to make that call can save you thousands in damage and insurance headaches. If you’re not sure whether it’s time to call a roofer, here’s how to tell.
- Active leaks or sagging ceilings: If you see water dripping from a light fixture, notice brown ceiling stains or feel soft spots in drywall, the damage has already reached the interior. Call immediately.
- Storm damage you can see from the ground: If you spot missing shingles, bent flashing or debris lodged in your roof valleys, it’s time for an inspection. Even if it looks minor, wind-driven rain can enter through a gap smaller than a coin.
- High-pitch or two-story roofs: If your roof has a steep slope or is difficult to reach, leave it to the pros. Professional crews use safety harnesses, roof anchors and OSHA-compliant equipment, things no ladder or backyard solution can replace.
- Roof damage after hurricanes or tornadoes: Storms in Central Florida can tear away shingles or lift underlayment without visible holes. A professional roofer can use moisture meters, infrared cameras and drone inspections to find hidden water before it spreads.
- When your tarp has been up for more than 90 days: Once it passes three months, UV rays and wind exposure weaken the material, even heavy-duty ones. At that point, it’s safer and more cost-effective to replace the damaged section or complete a full roof repair.
- When you’re unsure about the roof’s condition: If you can’t tell whether the roof needs a simple patch or a full replacement, don’t guess. A professional inspection gives you a clear picture of the roof’s structural health, remaining lifespan and code compliance.
Why local expertise matters
Central Florida weather is a category of its own. Intense UV exposure, salt air and hurricane-grade wind mean you need a roofer who understands regional materials, codes and insurance expectations.
Protect Preserve Roofing is a licensed Florida roofing contractor, serving homes from Daytona Beach to Tampa Bay. We respond within hours, not days and use FEMA-grade tarps and Xactimate-formatted documentation to meet the highest standards of quality and compliance.
Conclusion: Protect Your Roof the Smart Way
When storms hit Central Florida, every minute counts. A roof tarp can buy you time, but only when it’s sized right, installed safely and monitored carefully. What starts as a small leak can become a major repair faster than most homeowners expect. Protecting your home isn’t about quick patches; it’s about smart, timely action that keeps you safe until full repairs are complete.
The smartest move you can make is knowing when to call in professionals. A properly installed tarp does more than block the rain, it protects your structure, prevents insurance issues, and saves you from paying for preventable damage later. That’s where Protect Preserve Roofing makes the difference.
We’ve helped hundreds of Central Florida homeowners weather storms safely with professional tarp installation, leak detection and complete roof restoration. Whether you need an emergency fix or a permanent solution, we’ll handle it with the care and precision your home deserves.
If you live in Orlando or anywhere in Central Florida, we’ll come to you fast, safe and ready to protect your property before more damage spreads.
Don’t wait for the next downpour. Get a free, same-day inspection today at or visit our web site to learn more about our 24/7 emergency services.
Because when it matters, we have you covered.
What size tarp do I need for my roof?
It depends on the size of the damaged area and your roof’s pitch. Measure the length and width of the section you need to cover, then add at least four feet of overlap on each side. For steep roofs, add six feet. When in doubt, go larger — a 20×30 ft heavy-duty tarp covers most single-story homes in Central Florida.
What should I do immediately after a roof leak starts?
Move furniture and valuables away from the affected area.
Take photos or video from the ground for documentation.
Call Protect Preserve Roofing right away for emergency tarping — we’re available 24/7.
Stay off the roof. Wet surfaces are dangerous, even for professionals.
Why should I choose a professional roofer instead of doing it myself?
A professional roofer ensures your tarp is installed safely, sealed properly, and compliant with insurance standards. DIY installs often fail during high winds or heavy rain, leading to greater interior damage. With PPR, you get trained crews, OSHA-approved safety gear, and materials rated above 250 GSM.
Can you inspect my roof after a storm?
Yes. We perform construction-only roof inspections using moisture readings, photos, and drone imaging. Our reports identify structural conditions and code compliance — homeowners may choose to share them with insurance carriers if they wish.


Leave a Reply