


What size tarp for a garage roof will actually stop the water before it spreads? Sounds simple, right? However, most homeowners choose the wrong tarp size, leaving small gaps that cause thousands of dollars in interior damage.
According to the National Storm Damage Center, more than 1 in 5 Florida homeowners experience roof leaks during severe storms each year and a poorly fitted tarp is one of the leading reasons the damage worsens. That means the size of your tarp isn’t a small detail, it’s the difference between temporary protection and a soaked garage with mold issues weeks later.
So, how do you figure it out? How can you tell if a 20×30 ft tarp will actually cover your garage roof or if you need something larger and more durable?
This guide gives you the clear, step-by-step answer. You’ll learn how to measure correctly, pick the right material and avoid costly mistakes homeowners make after Florida storms. By the end, you’ll know exactly which tarp size to buy and when to call the professionals.
Because when leaks start, every minute matters and guessing the wrong size could cost you far more than a tarp.
Table of contents
Understanding the Right Tarp Size for a Garage Roof
Choosing the right tarp size for your garage roof isn’t guesswork, it’s a matter of precision. A tarp that’s too small leaves gaps where rain can slip through, while one that’s too large becomes difficult to secure and may tear in high winds. The goal is simple: full coverage that stays tight, flat, and safe.
Most garages in Central Florida are either single-car (about 12×20 ft) or two-car (20×20 to 24×24 ft). That means the average homeowner will need a tarp measuring at least 20×30 ft to ensure proper coverage with overlap. Overlap is key, always allow at least two to three extra feet on each side so the tarp can extend past the roof edge and be anchored securely.
To make it simple:
- A 12×20 ft garage roof typically requires a 16×24 ft tarp.
- A 20×20 ft roof needs a 20×30 or 25×30 ft tarp.
- If your roof has a steep pitch (high slope), add 10–15% more length to compensate.
A correctly sized tarp doesn’t just cover, it protects. It minimizes stress on the roof structure, prevents pooling and allows for secure tie-down points without creating dangerous tension.
Pro tip: If you’re unsure about your measurements, it’s safer to go slightly larger. But be careful, oversized tarps, when loosely installed, can act like sails in the wind. That’s why Protect Preserve Roofing recommends professional assessment before installation, especially after heavy storms or hurricane-season damage.
Standard Tarp Sizes and What They Actually Cover
The size printed on the label, called the cut size, refers to the dimensions before hemming and grommet placement. The finished size is usually 3 to 6 inches smaller on each side, meaning a 20×30 ft tarp often covers closer to 19.5×29.5 ft. That difference might sound small, but when it’s pouring outside, even half a foot can expose your roof edge to water intrusion.
Below is a practical breakdown of standard tarp sizes and what each can cover in real garage roof applications:
| Tarp Size (Feet) | Actual Coverage Area (Approx.) | Best For | Notes |
| 10×12 ft | ~9.5×11.5 ft | Small roof sections, patching around vents or skylights | Ideal for temporary repairs or partial coverage |
| 12×16 ft | ~11.5×15.5 ft | Compact single-car garages | Provides partial coverage or can be used in pairs |
| 16×20 ft | ~15.5×19.5 ft | Standard single-car garage roofs (12×20 ft) | Allows for 2 ft overlap on all sides |
| 20×30 ft | ~19.5×29.5 ft | Full two-car garage roofs (20×20 or 24×24 ft) | Most common size for garage roof protection |
| 25×40 ft | ~24.5×39.5 ft | Larger garages, workshops, or flat roof areas | Heavy-duty coverage; needs reinforced tie-downs |
| 30×50 ft | ~29.5×49.5 ft | Extended coverage for multi-bay garages | Best handled by professionals due to weight and risk |
Pro tip: Always round up when choosing a tarp size, never down. A slightly larger tarp ensures full coverage and allows for proper anchoring with sandbags or ropes without leaving the roof edges exposed.
If you’re covering a garage roof after storm damage, Protect Preserve Roofing recommends measuring both roof width and slope before choosing your tarp size. Need expert help? Get a precise tarp measurement and emergency installation quote at protectpreserveroofing.com/build-price-form.
How to Calculate the Correct Garage Roof Tarp Size (Step-by-Step Guide)
Getting the size right for your garage roof tarp isn’t complicated, but it does require attention to detail. Follow these five steps to calculate the correct tarp size with confidence:
- Step 1. Measure the roof length and width: Start by measuring the full length and width of your garage roof. Use a measuring tape or laser measurer and take readings from edge to edge, not just the area that looks damaged.
- Step 2. Include overhang and anchoring space: Your tarp should extend past the edges of the roof so it can be securely fastened without leaving any part of the surface exposed. A good rule is to add 3 feet to each side of your total measurement.
- Step 3. Factor in roof pitch (the steepness): The steeper the roof, the more coverage you’ll need. High-pitch roofs expose more surface area, which means you should increase your tarp size by another 10–15%. This ensures that the tarp lies flat and doesn’t pull or lift during heavy winds.
- Step 4. Choose the proper material and thickness: After you know the size, match it with the right tarp grade:
| Roof Condition | Best Type of Tarp | Approx. Thickness (mil) | Use Duration |
| Light leaks or short rain protection | Blue polyethylene tarp | 5–6 mil | Up to 45 days |
| Moderate storm or wind damage | Heavy-duty polyethylene tarp | 10–12 mil | 60–90 days |
| Severe roof damage or hurricane exposure | FEMA-grade or reinforced vinyl tarp | 14–20 mil | 3–6 months |
- Step 5. Double-check before installation: Spread the tarp flat on the ground and confirm it fully covers your measured dimensions. Once you’re sure, it’s ready for installation. Always secure the tarp with weights or straps, never nail or screw it into the roof decking, since that can void your insurance compliance and worsen the damage.
Quick reminder: If your garage roof has an irregular shape or a steep pitch, a professional on-site measurement is the safest option. Protect Preserve Roofing uses precision tools and licensed installers to measure and install emergency tarps.
What Size Tarp for Garage Roof: Custom Size Waterproof Tarps
A custom tarp is made to your roof’s exact measurements, ensuring full coverage without excess material flapping in the wind. It also eliminates the gaps and pooling issues that often happen when homeowners try to patch together multiple smaller tarps.

When a custom tarp makes sense
You should consider a custom-sized tarp if your garage roof:
- Has an irregular shape or mixed angles.
- Includes skylights, vents or chimneys that make coverage uneven.
- Is larger than 25×40 ft or has multiple roof sections.
- Has a steep pitch, where standard tarps can’t be anchored safely with sandbags.
- Needs long-term protection while waiting for a full roof replacement.
Custom tarps are typically made from reinforced vinyl or polyethylene, offering superior waterproofing, UV resistance and wind stability. They’re available in thicknesses of 14–20 mil, making them ideal for Florida’s harsh weather and hurricane season.
Benefits of custom waterproof tarps
| Feature | Advantage |
| Exact fit | Prevents leaks and flapping during strong winds |
| Heavier material | Lasts longer and resists UV damage |
| Tailored anchors and seams | Reduces risk of tearing under pressure |
| Insurance-friendly documentation | Matches the standards used by professional contractors |
Need a custom waterproof tarp for your garage roof?Request a professional measurement and quote today at protectpreserveroofing.com/build-price-form.
How to Properly Secure a Tarp on a Garage Roof
A tarp that isn’t fastened correctly can lift off in high winds, cause leaks to worsen or even damage your roof. The goal is to create a tight, sealed cover that protects without harming the structure beneath it. Here’s how to do it the right way:
- Clear and inspect the area: Before installing the tarp, remove any loose debris like branches, nails or broken shingles. This prevents punctures and helps the tarp sit flat. Always inspect the roof from the ground first, if it looks unstable or too steep, wait for a professional.
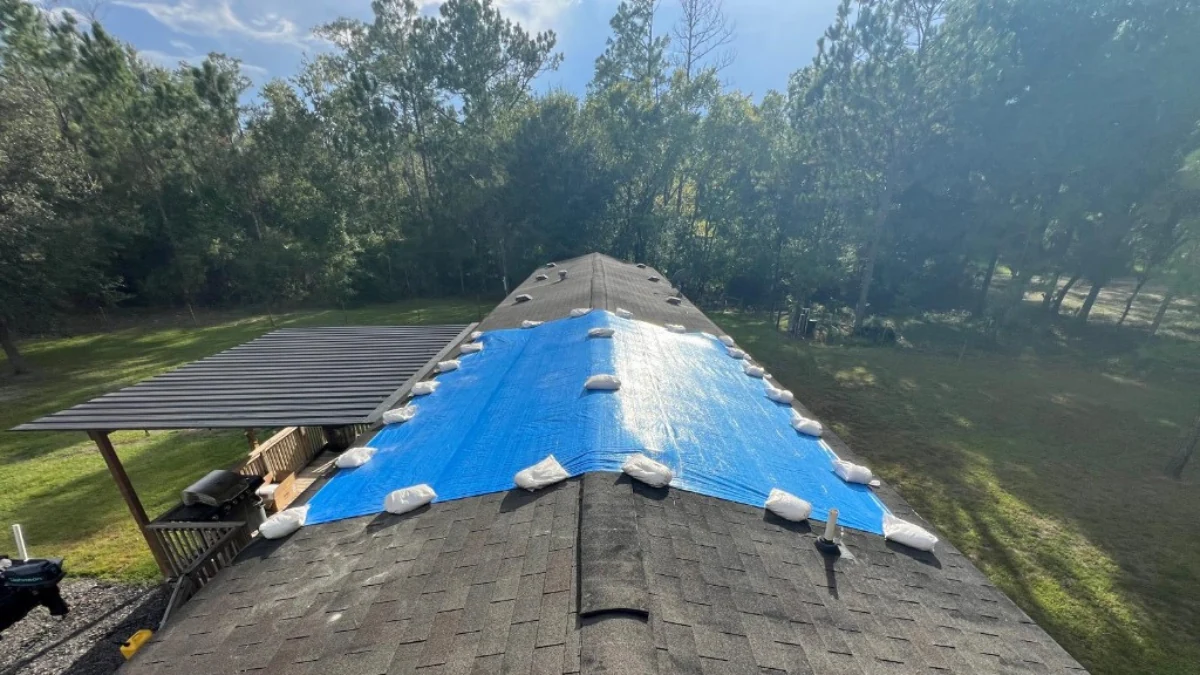
- Position the tarp correctly: Lay the tarp over the damaged section, making sure it extends at least 2 to 3 feet past the leak area in every direction. Center it on the ridge of the roof when possible, so water can flow off both sides evenly.
- Secure without nails or screws: Never nail or screw a tarp directly into the roof decking. Doing so can create new holes, worsen leaks, and may void your insurance coverage. Instead, use one or more of these safe securing methods:
- Sandbags: Place them evenly along the edges of the tarp to weigh it down without puncturing the surface.
- Roof anchors or clips: Hook onto existing roof features or gutters for stability.
- Rope or bungee cords: Loop through grommets and tie securely to solid anchor points.
- Create proper drainage: A common mistake homeowners make is pulling the tarp too tight or letting it sag in the middle. Either can cause pooling water, which adds weight and stress to the roof. Pull the tarp snug but leave just enough slack for rainwater to flow down and off the edges naturally.
- Check for wind resistance: Walk around the property (from the ground) and make sure the tarp is evenly secured. Look for loose edges that could flap in the wind, even a few inches of movement can tear the tarp over time.
Quick safety tips:
- Never climb onto a wet or storm-damaged roof.
- Avoid over-tightening ropes, it can rip the grommets or fabric.
- Don’t leave sharp debris under the tarp.
- Always wear non-slip shoes and secure footing when handling materials.
How Long Does a Garage Roof Tarp Last in Florida Weather?
While a tarp is designed as a temporary protection, how long it actually lasts depends on its material, installation quality and exposure. Let’s break it down clearly.
Light-duty (blue) tarps
These are the thin, lightweight tarps you find at most hardware stores. They’re inexpensive and easy to handle but not meant for long exposure.
- Average lifespan: 30–45 days under Florida sun and rain.
- Best for: Small leaks, short-term coverage after a mild storm.
- Limitations: UV rays quickly break down the plastic, causing brittleness and tearing.
If left exposed beyond a month, blue tarps can degrade fast, leaving your garage roof vulnerable to leaks and mold growth.
Heavy-duty polyethylene tarps
Heavier tarps, often silver or green, are reinforced with thicker fibers and UV-resistant coatings.
- Average lifespan: 60–90 days.
- Best for: Moderate damage or waiting for scheduled roof repairs.
- Advantages: Resists tearing and wind damage better than light-duty tarps.
- Maintenance tip: Check tension weekly and tighten if edges begin to flap.
These tarps hold up better during Florida’s rainy season but still shouldn’t be treated as a long-term solution.
FEMA-grade and reinforced vinyl tarps
These are the professional-grade tarps used by roofing contractors like Protect Preserve Roofing for emergency stabilization. They’re thicker, stronger, and built to last through heat, humidity and high winds.
- Average lifespan: 3–6 months.
- Best for: Major storm damage, hurricane response, or when roof replacement is delayed.
- Advantages:
- Resistant to UV and water degradation.
- Can handle sustained winds over 70 mph.
- Easier to anchor securely without tearing.
These tarps offer the maximum durability available for residential applications and are ideal for homeowners across Central Florida during hurricane season.
When it’s time to replace the tarp
If you notice fading color, frayed edges or sagging areas, the tarp has reached the end of its effective life. At this point, it’s best to call a professional to install a new one or begin your roof repair process.
A properly installed FEMA-grade tarp by Protect Preserve Roofing can protect your garage for months, but it’s always intended as a bridge to permanent repair, not a replacement.
Need long-lasting protection for your garage roof? Schedule a professional tarp installation today at protectpreserveroofing.com/build-price-form.
When to Call a Professional Roofer in Central Florida
Knowing when to call a professional roofer is critical, it can be the difference between a quick recovery and thousands in additional repairs. So, let’s take a look:
- When you see active leaks inside your garage: If water is dripping through the ceiling or pooling near the walls, the damage is already spreading beneath the surface. A professional roofer can trace the exact source of the leak, place the tarp correctly.
- When the roof is too steep or unsafe to climb: Many garage roofs in Central Florida have steep pitches or slippery shingle surfaces. Attempting to tarp them yourself is dangerous. Licensed roofers have the equipment and safety harnesses to work on inclines without risk of injury or additional roof damage.
- When the damage extends beyond shingles: If you notice missing shingles, cracked tiles or exposed decking, it’s time to call a professional immediately. These issues require more than just covering up the area, they may indicate deeper structural or water intrusion problems.
- When your tarp won’t stay secure: If your tarp keeps shifting or blowing loose, it’s a sign it’s either undersized or not properly anchored. Repeated adjustments can cause further wear on the roof. Professionals use non-invasive methods that hold without puncturing the roof surface.
- When you need documentation for insurance or repairs: After a major storm, your insurer may request photos, measurements or proof of mitigation. Protect Preserve Roofing provides all of that in compliance with Florida’s insurance standards without interpreting or managing your claim.
Why choose a local Florida roofing expert
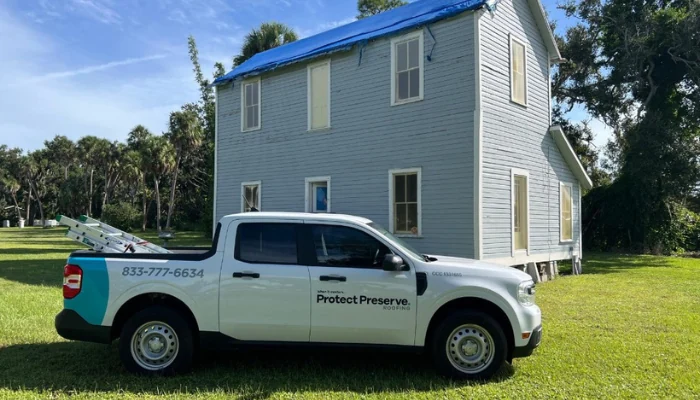
A Central Florida roofer understands the region’s climate and building codes better than anyone. From Orlando to Tampa Bay, Protect Preserve Roofing delivers fast, code-compliant service backed by Florida licensing, insurance and professional integrity.
Our average response time for emergency tarp installation is under two hours, and every project meets strict safety and documentation standards required by regional insurance carriers.
How Much Does a Garage Roof Tarp Installation Cost?
The honest answer is that it depends on several key factors, but in Central Florida, professional tarp installations by Protect Preserve Roofing typically range from $800 to $1,600.
This price includes the tarp itself, professional installation, safety measures and proper documentation compatible with insurance standards. It’s not just a patch job; it’s a stabilized, compliant protection service designed to keep your property safe until repairs can begin.
Factors that influence the price
The cost of a garage roof tarp installation depends on the scope of work. Here’s what affects the final amount:
| Factor | Description | Effect on Cost |
| Roof Size | The larger the garage, the more material and labor required. | Increases proportionally with square footage. |
| Roof Height & Pitch | Steep or multi-story roofs require more safety setup and time. | Higher pitch = higher cost. |
| Extent of Damage | Simple leaks are quicker to cover than collapsed or torn sections. | Moderate to significant increase if decking is exposed. |
| Tarp Type & Thickness | Blue, heavy-duty, or FEMA-grade tarps differ in cost and durability. | Thicker tarps cost more but last longer. |
| Accessibility | Limited access or obstacles (trees, fences, detached garages) increase setup time. | Moderate impact. |
| Emergency Response | 24/7 or same-day service during storm recovery may include surge labor rates. | Slight premium for emergency response. |
What’s included in professional installation
A professional tarp service covers more than just laying a sheet of plastic over your roof. You’re paying for a complete, documented process that prioritizes safety, compliance and longevity:
- Accurate on-site measurements with digital tools and drones.
- FEMA-grade or heavy-duty tarps rated for Florida’s wind and UV conditions.
- Non-invasive anchoring using sandbags, weighted straps and reinforced tie-downs, never nails or screws.
- Photo and documentation reports that meet insurance carrier standards.
- Two-hour emergency response goal across Central Florida.
Every installation is completed by licensed professionals who ensure the tarp is tight, sealed and safe, not a temporary fix that causes future issues.
Why cheap tarps can cost more later
It’s tempting to buy a $50 tarp from the hardware store and cover the roof yourself. However, low-cost materials and poor installation often lead to bigger expenses: water damage, mold, or even insurance claim denials.
A poorly fitted tarp can allow hidden moisture to spread through your garage insulation, drywall, and electrical systems. Fixing those issues can cost ten times more than professional tarping would have.
Maintenance and Replacement Tips for Roof Tarps
Think of your tarp as a temporary shield: reliable, but not invincible. With a little attention, you can make it last as long as possible until your permanent repair or roof replacement is ready.
Inspect regularly
After heavy rain or wind, take a few minutes to walk around your property and inspect the tarp from the ground. Look for:
- Loose edges or corners starting to flap.
- Small tears or punctures caused by debris.
- Pooling water forming in the center. If you see any of these issues, don’t wait. A small tear can spread quickly under Florida’s heat and humidity.
Pro tip: Check your tarp at least once a week during storm season, twice if you’re near the coast.
Keep it clean and free from debris
Branches, leaves or standing water can shorten your tarp’s lifespan. Use a soft broom or extendable pole to clear debris gently. Never climb onto a wet roof to clean the tarp, it’s safer to let professionals handle maintenance if the pitch is steep or slippery.
Check the anchors and straps
Over time, ropes and sandbags can shift or loosen. Make sure each anchor is still secure and evenly distributed around the tarp’s edges. A loose strap allows wind to get underneath, which can cause the tarp to lift or tear.
If you used sandbags, replace any that have split or shifted position. Avoid over-tightening ropes; a little flexibility helps absorb wind without stressing the tarp fabric.
Watch for UV damage and fading
Florida sun is harsh. Even UV-resistant tarps degrade over time, especially along edges and creases. Fading color, brittleness or cracking are signs the tarp’s waterproof coating is wearing off. When this happens, replace it before the next storm, not after.
Average lifespan guidelines:
- Blue tarps: 30–45 days.
- Heavy-duty tarps: 60–90 days.
- FEMA-grade tarps: 3–6 months.
Replace when necessary
A tarp’s job is to buy time, not replace your roof. If it’s starting to tear, sag or lose tension, it’s time to replace it. Reapplying an old or damaged tarp can do more harm than good, trapping moisture underneath and damaging your roof decking.
When in doubt, call Protect Preserve Roofing. Our licensed team can assess whether your tarp still provides proper coverage or if it needs to be replaced. We also document every replacement for your records, keeping your property insurance compliant.
Schedule regular roof assessments
Even if your tarp looks secure, hidden damage can develop underneath. A professional inspection ensures your garage roof remains structurally sound and that any trapped moisture is caught early.
Need your tarp inspected or replaced before the next storm?Schedule your service today at protectpreserveroofing.com/build-price-form.
Conclusion: Protect Your Garage Roof the Smart Way
Choosing the right tarp for your garage roof isn’t just about keeping the rain out, it’s about protecting your investment, your home and your peace of mind. In Florida’s unpredictable climate, a small leak can turn into a major repair overnight. That’s why acting fast and acting smart makes all the difference.
A properly sized and professionally installed tarp provides a secure barrier that shields your roof from wind, debris and water damage until full repairs can be made. Therefore, it’s more than just throwing a cover over the problem, it’s about installing the right material, in the right way, using the right method.
That’s where Protect Preserve Roofing comes in. Why homeowners in central Florida trust us:
- Fast emergency response.
- Licensed and insured in the state of Florida.
- Approved vendor for multiple insurance carriers.
- Comprehensive photo reports and carrier-formatted estimates.
If you’re in Orlando or anywhere in Central Florida, we’ll come to you fast, professionally and ready to secure your roof. Don’t wait for the next storm to expose your home’s weak spots. A small step today can save you thousands later.
Ready to protect your garage roof the smart way? Schedule your tarp installation or inspection today.
How do I know what size tarp I need for my garage roof?
Measure the length and width of the damaged area, then add at least 3 feet to each side to ensure full coverage and overlap. For instance, if the leak area is 10×12 feet, a 16×20-foot tarp usually provides proper coverage.
If your garage has a steep slope or multiple leak points, it’s best to have a roofing professional take exact measurements on-site.
How long can a tarp stay on my garage roof?
Blue tarps: 30–45 days
Heavy-duty tarps: 60–90 days
FEMA-grade tarps: 3–6 months
The exact lifespan depends on weather exposure and installation quality. In Florida’s sun and humidity, even durable tarps degrade faster — so regular inspections are key.
How much does a professional garage roof tarp installation cost?
In Central Florida, professional installations by Protect Preserve Roofing typically range from $800 to $1,600.
This includes the tarp, installation, labor, and safety equipment. Prices vary based on roof size, pitch, material, and the urgency of service (especially after storms).
Can I nail or screw the tarp into my roof?
No — never. Doing so creates new holes that can worsen leaks and may affect insurance coverage.
Professionals secure tarps using weighted sandbags, clips, or straps, not nails or screws. Exceptions are rare and only considered when the roof is already beyond repair and replacement is imminent.


Leave a Reply