


How to blue tarp a roof might sound like a quick fix, but one wrong step can turn a simple patch job into a soaked living room. Florida homeowners know the drill. One storm is all it takes. A few missing shingles, some flying debris and suddenly your roof isn’t keeping the rain out anymore.
According to the Insurance Information Institute, roof-related claims make up over 30% of all homeowners and most of those claims start with wind or water intrusion after the initial damage. And even if you don’t act fast or if you install the tarp the wrong way, you could lose coverage altogether.
That’s why today, in this guide, we’ll show you how to install a blue tarp without damaging your roof, understand what kind of tarp actually works, avoid common DIY mistakes that void insurance coverage, learn professional installation techniques used in Florida and know when to call for help.
Don’t risk the cost of doing it wrong, use this guide to protect your home and your peace of mind. All with one properly installed blue tarp.
Table of Contents
When Should You Blue Tarp a Roof?
If you’re asking this question, chances are your roof already gave you a warning. Maybe it’s a missing shingle or it’s a drip in the attic after last night’s storm. Either way, blue tarping isn’t something you plan months ahead. It’s a quick decision and if done late or wrong, it will cost you a lot.
Thereby, a blue tarp should go on when your roof is no longer watertight. That means:
- After strong winds tear off shingles.
- When a tree branch punches through the surface.
- If heavy rain causes flashing to lift or tiles to shift.
- Or even when there’s visible light from inside the attic.
And when the storm passes, it’s important to keep an eye out for these signs for blue tarp immediately:
- Curling or lifted shingles after a storm.
- Water spots forming inside your ceiling.
- Rust smells in the attic, a sign of trapped moisture.
- Flashing gaps or exposed underlayment.
- Loud wind noises through the roofline.
Pro tip from Protect Preserve Roofing: Always act fast. Many homeowners wait a few days to act. That’s when the real damage begins (insulation soaked, drywall ruined and insurance claims denied for negligence).
What You’ll Need to Blue Tarp a Roof Safely
Before you climb a ladder or touch a tarp, stop and check your gear. This is not the time to guess or improvise. A sloppy install doesn’t just leak, it can ruin your insurance claim.
Here’s what you actually need to get the job done right, fast and without damaging your roof:
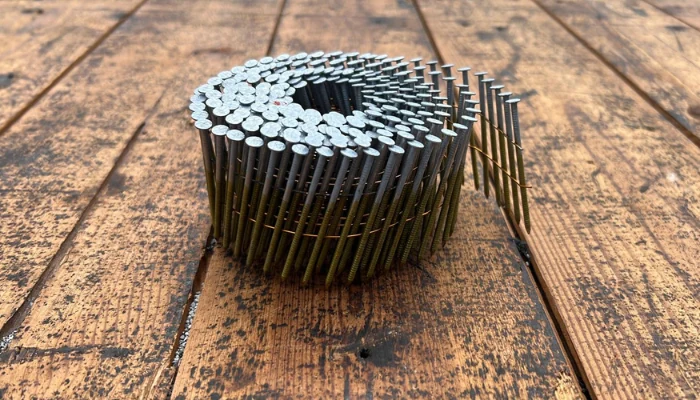
- Heavy-duty blue tarp (10–16 mil thick): Go for UV-treated and waterproof. Thicker is better. Avoid dollar-store versions.
- Sandbags or weighted boards: These keep the tarp in place without nails. Your roof stays safe and your claim stays valid.
- Extension ladder with stabilizers: Your balance matters. Always use a ladder that reaches at least 3 feet above the edge.
- Gloves and work boots: Protect your hands and feet. Wet roofs are slippery, don’t go up in sneakers.
- Rope or ratchet straps (as backup only): Use to secure sandbags if needed. Never tie around gutters or vents.
- Flashlight or headlamp: Storms don’t follow your schedule. Sometimes you’ll work at dusk or in low light.
Optional (but useful)
- Plastic sheeting: For added water control under the tarp.
- Plywood planks: Used as temporary supports under heavy water pooling or around holes.
- Camera or phone: Take pictures before and after for insurance. Every shot counts.
Don’t bring these
- Nails or screws (unless your roof pitch is dangerously steep): Driving fasteners into shingles opens leaks and gets your claim flagged. Protect Preserve Roofing only uses them as a last resort and always with documented justification.
- Tarps thinner than 6 mil: They rip fast and leave you exposed.
- Short ladders or broken ones: You’re not patching a fence. Roof work demands height and stability.
How to Blue Tarp a Roof Without Nails Like a Pro
A blue tarp isn’t just a cover, it’s a lifeline. Although only when it stays in place, doesn’t leak and doesn’t turn your roof into Swiss cheese.
You don’t need to be a roofing technician to do this right. What you need is to follow the right steps and avoid what makes most people go wrong. And we already know the first mistake: nailing the tarp directly to the roof. Let’s get straight to what works.
Step-by-Step: How to Blue Tarp a Roof Without Nails
1. Inspect the damage (safely): Use binoculars from the ground first. Look for missing shingles, holes or debris. Only go up if it’s safe.
2. Unfold and measure the tarp: Make sure the tarp covers the damaged area plus 3 to 4 feet beyond in all directions. That overlap keeps water out from the edges.
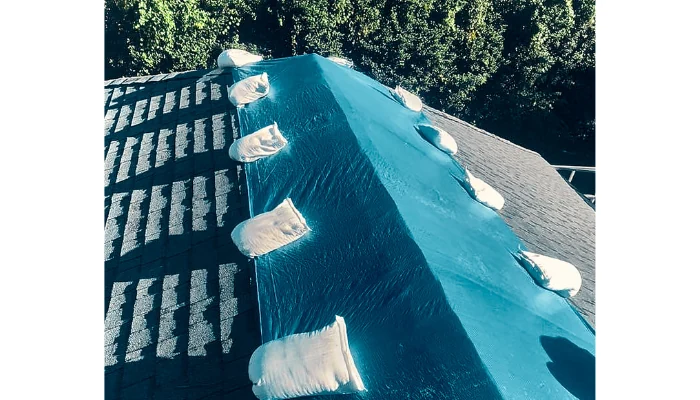
3. Place the tarp flat, smooth and centered: Don’t let it bunch or fold. Wrinkles trap water and lift in the wind.
4. Add sandbags or weighted anchor boards around all sides: Place them 12 to 18 inches from the tarp edge. Don’t block the drip path, water needs to run off freely.
5. Secure overlapping sections: If you need to overlap two tarps, do it like shingles: top layer over bottom, always facing away from the direction of wind/rain.

6. Double-check all corners and edges: Corners are weak spots. Add extra weight or temporary straps if needed, but never tie to gutters.
7. Take photos: Shoot from ground level, from each side. Save before and after.
How professionals make it last
At Protect Preserve Roofing, we follow these same principles, but we bring precision, speed and experience. Let us show you what we do differently:
- Use 12 to 16 mil tarps, always UV-treated.
- Seal all sides with edge tension, not pressure points.
- Use wood anchor boards or sandbags, depending on the roof pitch.
- Avoid any nailing, unless slope or safety demands it and even then, it’s documented for your insurer.
- Plan drainage so water doesn’t pool and add weight.
- Adapt to Florida’s heat and humidity, which weakens cheap tarps in days.
Quick reminder from Protect Preserve Roofing: The difference between a tarp that holds and a tarp that fails isn’t luck. It’s method. If you want it to last through the rain follow the steps or call someone who already knows them.
Avoiding Common DIY Mistakes on How to Blue Tarp a Roof
You did the tarp yourself. Great… however, now your claim got denied. That’s how fast things go south when the insurance company says you made the damage worse.
Blue tarping a roof isn’t hard, but it’s very easy to get it wrong in a way that costs you thousands later. So, let’s make sure that doesn’t happen.
- Mistake #1 – Nailing or screwing the tarp to the roof: This one kills claims, because it can cause more damage. Never put nails or screws through shingles, tiles or decking. Use sandbags, anchor boards laid over the tarp and weight (not puncture).
- Mistake #2 – Covering too little: A tarp that just barely covers the hole? Worthless. Always extend the tarp at least 3 feet beyond the damaged area in every direction. That’s how you block water from sneaking under the edge.
- Mistake #3 – Leaving gaps and loose edges: A tarp that flaps in the wind won’t hold. Secure every edge with tension and weight. Corners are weak points, double-check them.
- Mistake #4 – Skipping documentation: No photos = no proof. Before the tarp goes on, take clear pictures of the damage. After it’s installed, take more photos from every side.
- Mistake #5 – Using the wrong tarp: Thin, non-UV tarps will rip in Florida sun and wind. Use at least 10 mil, preferably 12–16 mil, UV-treated, with reinforced grommets.
Don’t forget: Your tarp isn’t just protecting your roof, it’s protecting your insurance coverage too. Mess it up and you may have to pay out of pocket.
Florida Conditions: Why Standard Blue Tarps Fail Fast
Florida’s weather turns weak tarps into wasted money. It’s not about looking blue, it’s about holding strong against UV, wind and rain. Below, you’ll see exactly why standard tarps fail and what actually works on Florida roofs:
| Condition | Standard Tarp (Fails Fast) | Florida-Ready Tarp (Lasts Longer) |
|---|---|---|
| Sun (UV Rays) | Fades, cracks, and weakens in days without UV treatment | UV-treated material resists breakdown for weeks |
| Wind | Lifts and tears under moderate gusts | Heavier weight + reinforced grommets = stays put |
| Rain & Humidity | Sags, pools water, and traps moisture — leads to mold and leaks | Proper drainage + tight anchor points prevent pooling |
| Durability (Thickness) | 5–8 mil thin tarps tear fast | 12–16 mil thickness withstands storm conditions |
| Installation | Often tied to gutters or poorly weighted — easy to fail | Sandbag/board anchored, flat and extended past damage area |
What to use in Florida:
- Thickness: 12–16 mil.
- Treatment: UV + waterproof.
- Anchoring: Sandbags or weighted boards.
- Size: Extend 3+ feet past the damaged area.
- Edges: No flapping, no folds. Tensioned and smooth.
Florida weather doesn’t give second chances. Use the right tarp or risk redoing the job with more damage.
Insurance Dos and Don’ts: What Really Gets Covered
Putting a tarp on your roof is one thing, protecting your insurance claim is another. Most homeowners think just covering the hole is enough. Therefore, insurance companies have rules and if you break them, you could be stuck paying for the repairs alone, even with active insurance.
Let’s make sure that doesn’t happen.
What you should always do
Act fast.
Insurance companies expect you to protect your home from further damage right after a storm. Waiting too long, even just a few days, gives them an excuse to deny your claim.
Use the right method.
Sandbags and anchor boards are your friends. Nails, screws and quick fixes that cause more damage? Those work against you.
Take photos before and after.
Don’t rely on memory. Shoot every angle, every corner and every exposed spot before you tarp, then shoot again after it’s in place.
Keep every receipt.
Bought a tarp? Paid someone to install it? Save those papers. You’ll need them to get reimbursed.
Choose quality materials.
Thin, cheap tarps that rip in two days won’t count. A good tarp shows you took the situation seriously.
What you should never do
Don’t nail into the roof… ever.
Unless you’re on a dangerously steep pitch with no other option (and even then, it should be documented), nails will void your claim. Period.
Don’t assume a small leak can wait.
If you see water stains or feel moisture, that’s already damage. Waiting makes it worse and some people might say it’s your fault.
Don’t ignore documentation.
No photos, timestamps or paper trail? You’re giving the insurer a free pass to say “denied.”
Don’t wait for approval before acting.
Your insurer expects you to tarp the roof before they show up. If you wait for them, they may say you let the damage grow.
Quick reminder from Protect Preserve Roofing: we’ve seen claims get denied over a $2 mistake, like tying a tarp to a gutter and causing it to collapse. That’s why we install tarps the way insurers like: clean, safe, documented and fast.
Maintenance Tips to Avoid Needing a Tarp Again Soon
Let’s be honest. Nobody wants to climb a roof in the rain holding a giant blue tarp. If you’ve had to tarp your roof once, the best move now is to make sure you never need to do it again, at least not anytime soon.
The good news? Most roof emergencies don’t start as big disasters. They start as small problems no one noticed. That’s why you can prevent some or stop those problems before they turn into leaks, damage and last-minute tarp drama.
Inspect after every major storm
Florida storms hit hard and fast. Even if your roof looks fine from the ground, there could be lifted shingles, loose flashing or tree debris that starts trouble later.
Therefore, after every big wind or heavy rain:
- Walk around the house.
- Check for pieces of shingle or debris on the ground.
- Look up for sagging spots or shiny areas (wetness).
- Peek in the attic for damp smells or dark spots.
Keep gutters and downspouts clear
Clogged gutters are a top reason water backs up under your roof edge. That water doesn’t just drip, it can rot wood, rust nails and undermine your whole roofline.
At least twice a year (or more in leaf season):
- Clear leaves, nests, and muck.
- Flush gutters with a hose.
- Make sure water flows away from the house.
Watch the edges and seams
Water doesn’t always crash through the middle of the roof. It sneaks in at the weak points:
- Flashing around vents and chimneys.
- Roof valleys (where two slopes meet).
- Edges near fascia and soffits.
Look for cracks, gaps or anything that looks “off.” A $10 tube of roofing sealant today beats a $1,000 tarp job tomorrow.
Most important: don’t ignore small leaks. A drip in the attic isn’t “fine.” It’s the start of rot, mold and a denied insurance claim. If you hear or see signs of water, act fast. Even a quick patch or inspection can buy you time before real damage sets in.
Pro tip from Protect Preserve Roofing: Once a year, let someone who does this daily take a look, like us. We offer inspections tailored for Florida homes, especially before hurricane season. We know what weak spots to look for and how to fix them before they become big.
Conclusion: Fast, Safe Tarping Backed by Local Pros
Blue tarping a roof isn’t about style. It’s about protecting your house, your family and your insurance claim. In Florida, where storms don’t give warnings, you don’t get much room for error.
You’ve learned what works and what fails; you’ve seen how the right tarp, installed the right way, can make all the difference between a fast claim and a denied one. Now ask yourself: do you really want to gamble with wind, rain, and your roof?
At Protect Preserve Roofing, we’ve installed thousands of blue tarps across Central Florida, always with speed, care and full insurance documentation. We don’t guess, we show up, secure the roof and give you peace of mind when things are falling apart.
Need a tarp installed today? Call us and secure your home before the next cloud rolls in. Need an inspection on your roof? We can schedule a free visit. If you already have damage and would like to know the value quickly to include in your budget, just click here for an estimate.
Don’t wait for the damage to grow, contact Protect Preserve Roofing today.


Leave a Reply