


Roof tarping can save your home when the storm clouds roll in, but only if done right. Every year, thousands of Florida homeowners rush to tarp damaged roofs after wind and rain hit hard. When the job is rushed or wrong, the fix can cause more damage than the storm itself.
According to the National Storm Damage Center, roof damage accounts for over 40% of insurance claims after major storms in the U.S. That’s not a small number.
So, what’s the smart move? Well, today you’ll learn how to tarp a roof safely, why Florida weather demands UV-protected materials, which tarps last, the real consequences of poor tarp installation and how expert support can protect your claim and your home
Don’t wait until the next storm warning. Your roof doesn’t come with a second chance. Let’s make sure you get it right the first time.
Table of contents
Understanding Roof Tarping: What It Is and Why It Matters
A damaged roof doesn’t wait for a good time to fall apart. When a storm hits or shingles start flying, you need an immediate plan and that’s where roof tarping comes in.
Roof tarping is a temporary fix that covers exposed or broken areas with a waterproof barrier. It blocks rain, wind and debris from making things worse. More importantly, it buys you time to get a real repair done without rushing decisions or battling even more damage.
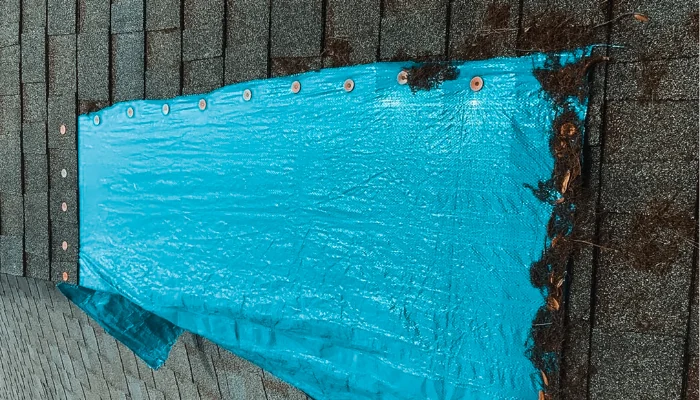
If you’ve ever seen a big blue sheet flapping on a roof after a storm, that’s a tarp. But not all tarps do the job right. Some fall apart in days under Florida sun, others leak at the seams.
A proper tarp, installed with the right tension and support, can stop thousands of dollars in water damage cold. Here’s the part many homeowners miss: insurance companies often expect you to act fast.
So, why does roof tarping matter? Because it protects your home when you’re most vulnerable, keeps your insurance options open and it gives you control in a chaotic situation.
When to Use a Roof Tarp: Identifying the Right Situations
A tarp isn’t something you throw on the roof just because it rained. It’s a tactical move and knowing when to use it can make the difference between smart prevention and wasted time (or worse, more damage).
When roof tarping actually makes sense:
- After storm damage: If your roof lost shingles, took a hit from a falling tree or you see daylight where there shouldn’t be, cover it fast. Every hour without protection increases the risk of leaks.
- Active leaks: Got water dripping into a bucket in your living room? That’s your sign. If water is entering, even slowly, a tarp gives you breathing room until a full repair can happen.
- Before a storm (prevention): If you already know a vulnerable area exists – say, cracked flashing or a patch you’ve been “keeping an eye on” – get a tarp on it before wind and water test your luck.
- Delay in repairs: If your roof is exposed, delaying taking appropriate action will be risky. Don’t wait for a colleague or approval, install the tarp yourself or call the professionals.
- Insurance mitigation: Most policies expect you to act fast. If you don’t tarp and the rain soaks your insulation or drywall, the adjuster might say, “That extra damage? That’s on you.”
Red flags that tell you it’s time to roof tarping:
- Missing or curled shingles.
- Exposed wood decking.
- Ceiling stains or soft spots.
- Loose flashing near chimneys or vents.
Quick reminder from Protect Preserve Roofing: A well-installed tarp slows the clock, blocks the rain and gives you control over what happens next.
Choosing the Right Tarp: Materials and Features to Consider
Not every tarp is built for a roof. Some are made for backyard barbecues. Others? They hold up under Florida’s brutal sun and 50 mph gusts. If you’re covering your home, choose like it matters because it does.
First: What is the tarp made of?
- Polyethylene (PE): This is the most common tarp for emergency roof coverage. It’s lightweight, waterproof and budget-friendly.
- Vinyl: Heavier and more expensive, often used in industrial jobs and stronger in wind, but usually overkill for short-term home protection.
- Canvas: Not for roofs. Canvas absorbs water, that means mold, leaks and a failed tarp job.
Second: Is it UV-treated?
Florida’s sun doesn’t joke. If your tarp isn’t UV-resistant, it’ll crack or tear in a matter of days. Always check the label for UV treatment, especially if the tarp needs to stay on longer than 72 hours.
Look for these key features:
- Reinforced edges: These stop the tarp from shredding at the corners during wind gusts.
- Grommets every 18 to 24 inches: Fewer grommets = sloppy installation. You need frequent anchor points for a solid hold.
- Thick grade (mil rating): Go for 10 mil or more for roof tarping. Thin tarps may cost less but tear faster and fail under tension.
- Waterproof, not just water-resistant: Double-check. Some cheap tarps repel water at first but absorb over time.
Third: Blue is not the same as good
People assume that “blue tarp” means “roof tarp”. The truth is: the color means nothing unless it’s paired with the right specs. Always check:
- Thickness.
- UV resistance.
- Intended use (not just the color!).
Also read:
- Why Are People Putting Blue Tarps on Their Roofs? Discover Here – Protect Preserve Roofing
- Why Is China Putting Blue Tarps on Their Roofs? Explained – Protect Preserve Roofing
Step-by-Step Guide: How to a Roof Tarping Safely and Effectively
Tarping a roof sounds simple, but doing it wrong? That’s how leaks get worse and claims get denied. Here’s how to do it the right way:

- Step 1: Safety first, always: Wait for the weather to clear (never tarp during rain or high wind). Use a safety harness or rope if the roof is steep and have someone on the ground in case you need help.
- Step 2: Inspect and measure: Find the damaged area and add 3-4 extra feet on each side to make sure you fully cover the leak. Don’t guess, measure it.
- You’ll need a heavy-duty UV-resistant tarp (10 mil+), sandbags or weighted objects, ropes or nylon straps, ladder, gloves and patience.
- Step 3: Lay the tarp over the damaged area: Center the tarp flat over the leak with equal overhang on all sides. Make sure the tarp lays smooth (no gaps, wrinkles or flaps that wind could lift).
- Step 4: Secure without nails: Do not nail the tarp into your shingles. This breaks your waterproof barrier and often voids insurance claims.
- Instead use sandbags along the edges to hold the tarp in place, tie ropes to grommets and anchor them to stable ground or around chimney bases and use temporary roofing tape along the edges for extra grip (optional but helpful).
- Step 5: Check it after 24 hours: Return the next day. If the tarp shifted, sagged or started flapping, re-anchor it before the next storm. One loose corner = one flooded attic.
Pro tip from Protect Preserve Roofing: Take photos for insurance. Before, during and after installation. This proves you acted fast and avoided further damage, something insurers look for when processing claims.
Common mistakes to avoid during roof tarping
Roof tarping looks simple. However, one wrong move and you’re in for a bigger mess. You need to be clear of these mistakes:
- Nailing the tarp into the roof: Driving nails or screws through the tarp into your roof may seem secure, but it creates more holes which means more leaks. Only use nails if it’s a steep pitch and there’s no other option.
- Using a thin or cheap tarp: Cheap tarps melt, tear and flap around. Look for heavy-duty tarps at least 10 mil thick and UV-resistant.
- Covering just the leak, not the surrounding area: Always tarp a wide area, going at least 3 feet past the damaged section in all directions. That’s how you keep the water out.
- Leaving the tarp loose: If the tarp isn’t tight, the wind will catch it and rip it off. You’ve got to stretch it snug and weigh down the edges.
- Rushing in bad weather: Installing a tarp during a storm is risky for you and your roof. Slips happen and it’s easy to mess up the setup under pressure. If possible, wait for a break in the weather or call in pros who can do it safely.
- Forgetting to Document the Damage
Each one of these steps can be the difference between protecting your home and making the problem worse. So, be careful.
Cost Considerations: DIY vs. Professional Roof Tarping
When your roof is leaking or exposed after a storm, you want a quick solution, but is doing it yourself worth the savings? Or should you call the pros? Here’s a direct comparison to help you decide:
| Factor | DIY Tarping | Professional Tarping |
| Estimated Cost | $100 – $250 (materials only) | $800 – $1,600 (includes labor, materials, insurance docs) |
| Material Quality | Basic blue tarps, not always UV-resistant | Heavy-duty tarps, UV-treated, sealed edges |
| Installation Time | 2–4 hours depending on experience | 1–2 hours with trained crew |
| Skill Needed | High — roof work is risky and must be precise | None — handled by trained professionals |
| Insurance Compliance | Risky — improper setup can void your claim | Meets insurance standards, comes with proper documentation |
| Durability | Temporary, often short-lived in Florida heat | Longer-lasting, with proper sealing and placement |
| Risk of Further Damage | High if installed incorrectly | Very low — correct technique prevents water entry |
As you can see DIY might seem cheaper. However, mistakes can lead to denied claims or bigger roof repairs. Professional tarping includes peace of mind, proper sealing and no risk to your personal safety.
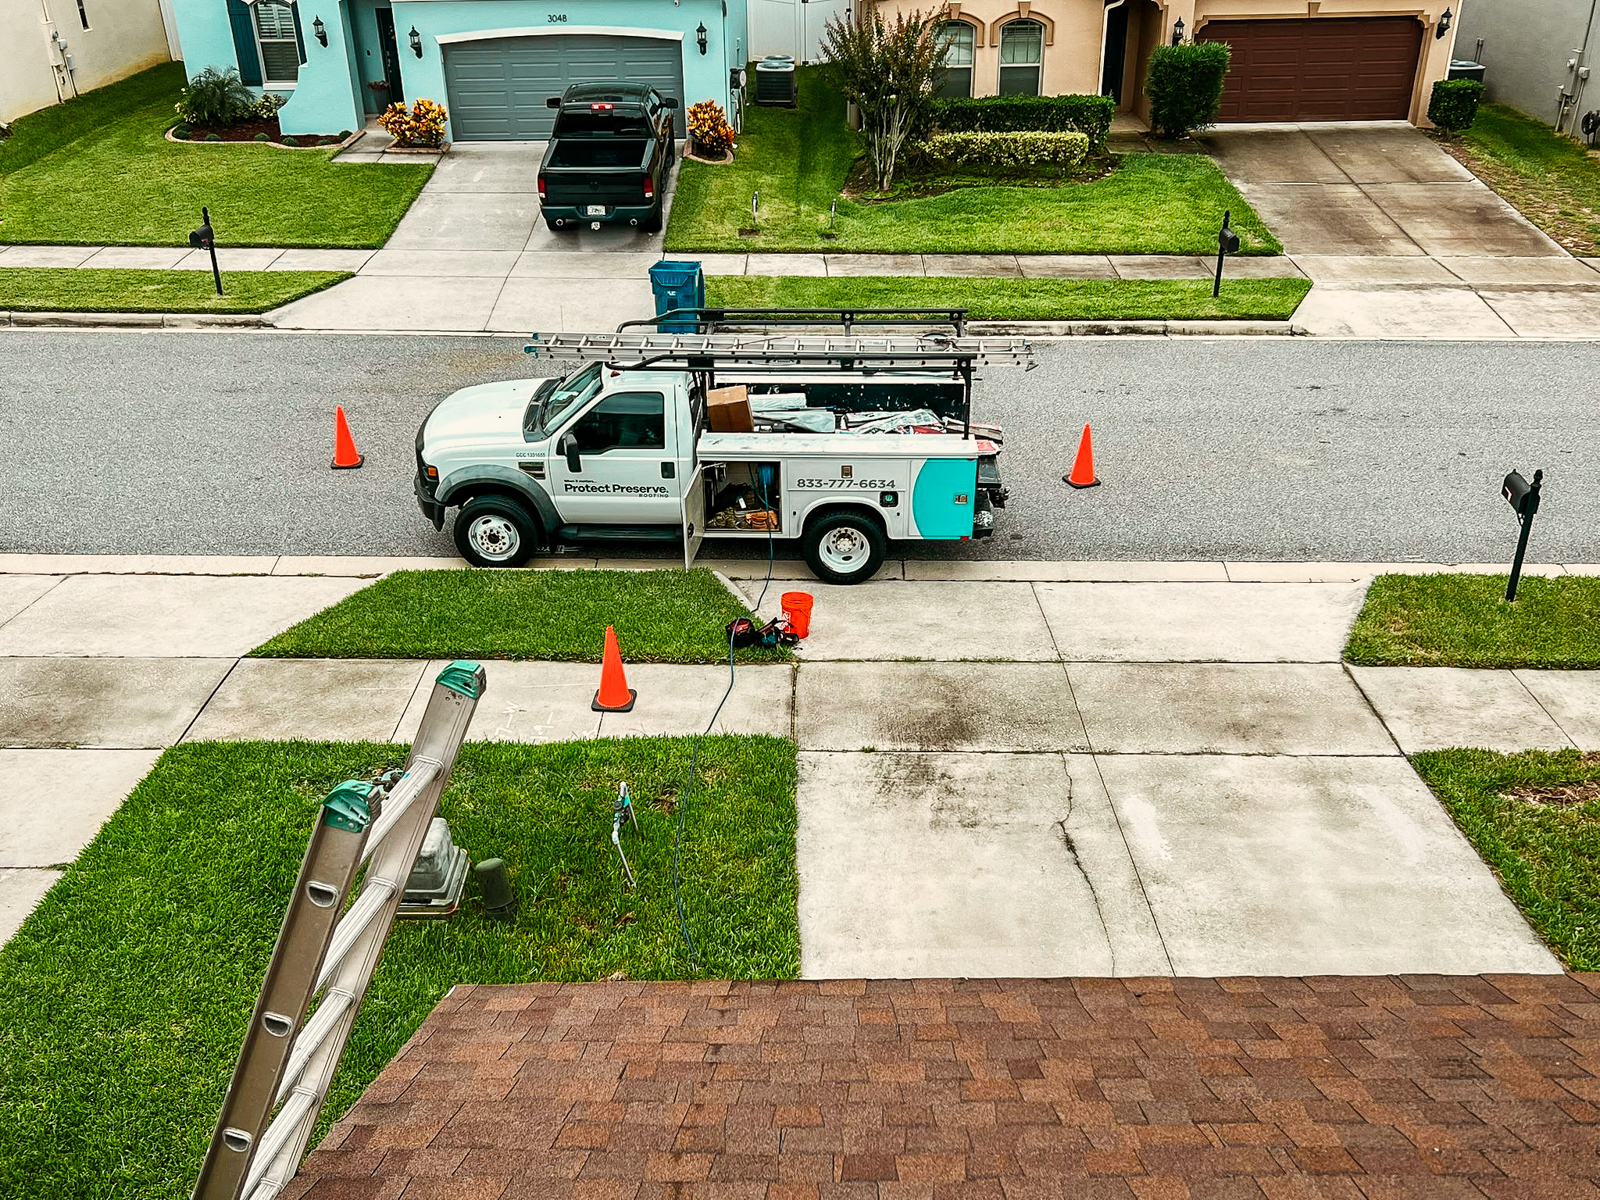
Quick reminder: Need a tarp installed fast and done right? Protect Preserve Roofing offers safe, quick roof tarping that meets insurance requirements and protects your home before the next storm hits.
Insurance Implications: Navigating Claims for Roof Tarping Damage
Filing a claim after roof damage? One wrong move, like using the wrong tarp or skipping documentation, can cost you the payout.
What insurance usually covers
Most homeowners insurance policies cover sudden and accidental roof damage. That includes windstorms, hail, fallen branches and hurricane-force events. Therefore, they don’t cover neglect or damage that got worse because of poor protection.
Here’s what they typically cover:
- Wind or hail damage.
- Tree or debris impact.
- Rain intrusion after storm events, if you took reasonable steps to prevent more damage.
What they don’t cover
Insurers are strict about this part:
- Leaks from old age or poor maintenance? Not covered.
- Improper tarp installation that caused more damage? Not covered.
- Delays in protecting the roof after the damage? Not covered.
In Florida, especially, this happens a lot after storms. Homeowners wait too long or nail down a tarp without knowing that holes from nails can void coverage.
Tips to stay covered and get paid
To keep your claim on track, follow these proven steps:
- Install the tarp immediately after the damage.
- Avoid nails or screws unless absolutely necessary; use sandbags or weights to secure the tarp without puncturing the roof.
- Take pictures before and after the tarp is installed.
- Keep receipts (materials, professional help, etc. everything helps prove the cost of mitigation).
- Use a certified tarp service professional, like Protect Preserve Roofing.
Quick reminder from Protect Preserve Roofing: A blue tarp might look like a temporary patch, but when done right, it’s a powerful tool to protect your roof and your claim.
Preventative Measures: Preparing Your Roof for Future Storms
Storm damage isn’t always preventable, however the cost of doing nothing is much higher. If you want your roof to hold strong next time the wind howls, it pays to be ready.
1. Get regular roof inspections
A quick visual check once a year isn’t enough. Schedule a professional roof inspection at least once a year and always before hurricane season starts in Florida. Inspections help identify:
- Loose or missing shingles.
- Weak flashing around vents and chimneys.
- Clogged gutters that cause water backup.
- Signs of sagging or water pooling.
2. Trim trees and remove debris
Branches that hang too close to your roof can turn into battering rams during strong winds. Clean up your yard and:
- Cut back overhanging limbs.
- Remove dead trees or large loose branches.
- Clear leaves and debris from gutters.
3. Reinforce roof structures if needed
Older homes or roofs with past repairs may need reinforcement. Ask a licensed contractor to evaluate:
- The integrity of the roof decking.
- Hurricane clips and fasteners.
- The strength of ridge caps and edge sealing.
4. Use UV-resistant materials
In Florida, sun damage is real. That’s why choosing UV-treated tarps and roofing materials can make a big difference. Regular tarps may only last weeks in direct sun, while UV-resistant options hold up for months, even under brutal heat.
5. Keep emergency materials ready
Don’t wait for the shelves to clear after a storm warning. Keep these items on hand:
- One or two heavy-duty UV-treated blue tarps.
- Sandbags or weighted anchor systems.
- Roofing tape or adhesive.
- A flashlight and roof-safe ladder.
Quick reminder: Storm prep doesn’t have to be complex or costly, but it must be intentional. Protect Preserve Roofing helps Florida homeowners with pre-storm consultations and guidance because the best tarp is the one you never have to use.
Roof Tarping: Florida-Specific Advice
Florida isn’t just about palm trees and beach days. When it comes to your roof, the Sunshine State is a battlefield. Heat, humidity, storms… your tarp doesn’t just need to cover the roof. It needs to survive Florida.
UV exposure is no joke
Florida’s sun is relentless. A standard blue tarp not treated for UV will start breaking down in as little as two weeks under full sun exposure. That’s why it’s essential to:
- Choose UV-treated tarps (ideally rated for at least 3 months outdoors).
- Inspect for signs of sun damage: fading, brittleness, and cracking.
- Store extra tarps indoors in a cool, dry place, never in the garage or under the porch.
Humidity and mold buildup
High moisture and poor air circulation under a tarp = mold, rot and a roof that smells like a swamp. To prevent this:
- Never leave a tarp flapping or loose, it traps moisture.
- Make sure water can run off cleanly without pooling.
- Avoid sealing all edges if the underlying roof is already wet.
Wind lift during storm season
Florida’s wind gusts are fierce. A poorly secured tarp becomes a sail or worse, a liability. You’ll want to:
- Use weighted anchors or sandbags.
- Never rely solely on nails (unless on steep pitches as last resort).
- Recheck tarp tension weekly during storm season.
Hurricane season timing
In Florida, tarp demand spikes between June and November. That’s when storms strike and stores run out of supplies. Plan ahead:
- Schedule inspections early (April or May).
- Buy tarps before summer, not after your neighbor grabs the last one.
- Ask about professional pre-storm tarp prep with Protect Preserve Roofing.
Bottom line: Florida roofs fight a different fight. Rain, sun, salt, storms and the insurance adjuster… Choose smart, act fast and if you need backup, Protect Preserve Roofing is ready to get you covered.
Conclusion: Protecting Your Home with Protect Preserve Roofing
When a storm hits and your roof takes the blow, you don’t have time to guess. You need a tarp that holds, a team that shows up fast and a job done right the first time. That’s where Protect Preserve Roofing makes all the difference.
We don’t leave your roof to chance. Our blue tarps are UV-treated, installed without shortcuts and placed with your insurance compliance in mind. We understand Florida’s heat, storms and strict insurance standards because we deal with them every single week.
Our team steps in, secures the damage and helps you document everything properly, so your insurer doesn’t have excuses.
If your roof is leaking, damaged or just one storm away from trouble… don’t wait. Contact us today and secure your home before the next storm has a chance to make things worse. You can also quickly get an estimate here, because we only want to help you to protect your home.


Leave a Reply