


Water damage from a leaking roof is one of those problems that starts small, just a faint stain on the ceiling or a drip you notice during a storm. But what if that “small” leak is already rotting the wood under your shingles, soaking your insulation, and turning your attic into a mold factory?
According to the Insurance Information Institute, nearly 1 in 50 homeowners file a water damage claim each year and roof leaks are among the top culprits. So, if you’re dealing with that dreaded drip or a suspicious brown ring on your ceiling, don’t ignore it. The clock is ticking, and every hour gives the damage more ground.
That’s exactly what this guide is here to answer. We’ll break down what roof water damage actually looks like, how fast things go from “no big deal” to “call a contractor now”, what your insurance may cover and how to stop it from happening again for good. Let’s show you what’s really going on above your head.
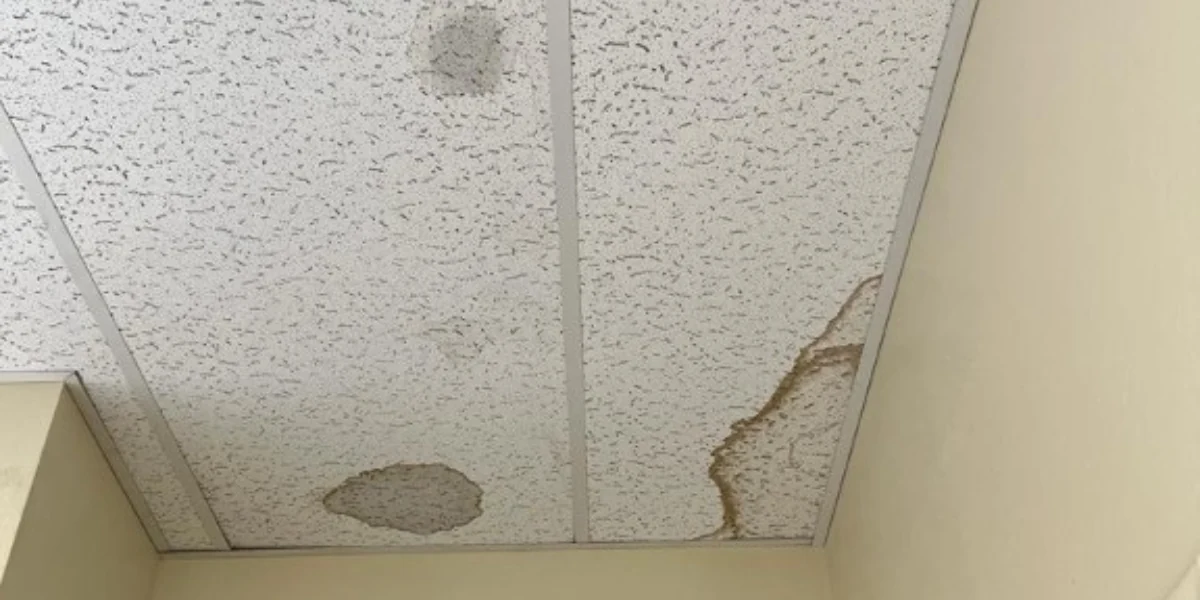
What Does Water Damage from Leaking Roof Look Like?
Water damage from a leaking roof doesn’t always show up with a big splash. Sometimes, it hides and causes more trouble. That brown circle on the ceiling tells you water has soaked into places it shouldn’t, places like:
- Insulation: It gets soggy fast and starts growing mold.
- Drywall: Water weakens it and soon it starts sagging or cracking.
- Ceiling paint: Peeling, bubbling or discolored patches are signs of trouble.
- Floorboards below the leak: Water travels, it doesn’t stay put. You might have warped wood or soft spots in the floor.
Sometimes it gets worse fast and you’ll notice:
- Musty smells in the attic or nearby rooms.
- Electrical flickering near ceiling lights.
- Soft spots in the ceiling when you press gently.
How Fast Does Water Damage from a Leaking Roof Spread?
Water doesn’t wait. Once it gets in, it starts working fast and not in your favor. Within the first 24 hours, moisture can:
- Soak through drywall.
- Collapse insulation.
- Trigger mold spores.
- Stain ceilings and walls.
After that, things move from bad to worse. In 48 to 72 hours, you might see:
- Mold spreading across surfaces.
- Electrical risks increasing.
- Wood starting to rot.
- Paint bubbling and flaking.
By the end of the first week, water has usually reached places it shouldn’t, like floorboards, support beams and HVAC systems. That’s when damage shifts from “manageable” to major renovation territory.
What makes it spread so fast?
- Water travels through gravity.
- It follows wiring, beams, and cracks.
- Warm, dark attic spaces create a perfect environment for mold.
- Humid states like Florida speed it up even more.
Quick reminder: Water always takes the path of least resistance. Don’t give it time to explore your house. If you suspect a leak, a professional team like Protect Preserve Roofing can step in fast with trained eyes and the right gear.
Most Common Roof Leak Sources
Not all roof leaks start with a missing shingle. Some sneak in through spots you wouldn’t expect and once they start, water damage follows fast. Here are the usual suspects we see every week:
- Cracked or missing shingles: Strong winds, falling branches or simple aging can loosen or tear shingles. One missing piece is all it takes for water to get in and cause thousands in damage.
- Worn flashing: Flashing is the thin metal strip that seals the joints on your roof like where the chimney or vents connect. If it rusts or lifts, rain has a direct path inside.
- Clogged gutters: When gutters are packed with leaves, water overflows and pools near roof edges. From there, it can creep under shingles or soak through the fascia.
- Roof vents and pipe boots: Those rubber or plastic covers around vent pipes? They crack over time from sun exposure. Once they fail, leaks usually start small, but never stay that way.
- Poor sealing around skylights: Skylights look great. However, if they’re not sealed right, water seeps in around the edges and damages the ceiling below.
- Chimneys: Old mortar or loose bricks allow water to slide in between cracks and run down into attic spaces. This is a slow leak that often hides for weeks.
- Nail holes and improper repairs: Even repairs can be a problem, especially if someone nailed a tarp directly into your roof or used quick fixes that don’t last through heavy rain.
Spot the signs:
- Dripping sounds after rain.
- Soft spots on the ceiling.
- Discolored patches or mold near vents or corners.
- Curling or missing shingles visible from the ground.
Quick reminder: Leaks don’t ask permission. They find a way in and if you don’t stop them early, they’ll keep digging. Protect Preserve Roofing knows where to look, how to fix it and how to keep it from coming back.
How to Tell If Water Damage Is Coming from the Roof
Not all water damage starts from above. But when it does, it brings clues. You just need to know where to look and how to read the signs.
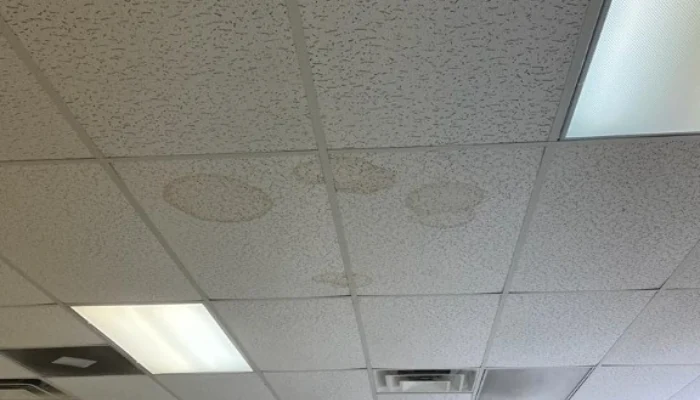
- Ceiling stains that keep growing: Brownish or yellowish stains are classic roof leak alerts. If the spot grows after it rains, your roof’s the culprit.
- Drips or wet spots after rain: Check your attic during or right after a storm. If you spot fresh moisture on beams, insulation or the ceiling, that’s roof runoff.
- Mold along ceiling edges or corners: Mold doesn’t randomly appear. It needs moisture and if you’re seeing fuzzy growth or black spots in ceiling corners or near windows, the water likely started up top.
- Peeling paint or bubbling drywall: Paint and drywall hate moisture. If you see bubbling, soft walls or sagging textures, it’s time to investigate your roof.
- Musty odors that don’t go away: A constant musty smell means water has settled in somewhere it shouldn’t. Don’t cover it up, trace it.
- High humidity in rooms below the attic: If your HVAC isn’t the issue but rooms feel damp, your attic may be holding hidden moisture and that moisture often comes from leaks above.
Not sure where it’s coming from?
Here’s what we recommend:
- Avoid guesswork.
- Don’t poke or peel areas yourself.
- Call a licensed pro, like the team at Protect Preserve Roofing, to inspect safely and accurately.
Will Homeowners Insurance Cover Water Damage from a Leaking Roof?
The short answer: sometimes, but not always. Let’s break it down without the confusing insurance jargon.
When insurance might cover it
Most homeowner policies will cover sudden and accidental damage. For example:
- A windstorm rips shingles off, and rain pours in.
- A tree branch crashes onto the roof during a storm.
- Ice dams form fast, and water leaks through the ceiling.
When insurance won’t cover it
Here’s where it gets tricky. Insurance companies almost never pay for:
- Long-term leaks you didn’t fix.
- Roofs older than their lifespan (usually 20–30 years).
- Damage due to poor maintenance.
- Mold caused by slow leaks.
What you need to know
- Documentation is key. Take photos at the first sign of a leak.
- Get a professional inspection. Our team at Protect Preserve Roofing provides reports you can share with your insurer.
- Avoid DIY patch jobs. Insurance may deny claims if repairs weren’t done by licensed contractors.
Quick reminder: If you act fast and use professionals, you have a much better shot. But if you wait, delay or ignore it? You’ll likely pay from your pocket. Protect Preserve Roofing knows how to step in before that happens and how to help you document it right.

Cost to Repair Water Damage from a Roof Leak
Let’s talk dollars because leaks don’t just soak your ceiling. They drain your wallet if you let them sit:
| Damage Type | Average Cost Range (USD) |
|---|---|
| Minor ceiling stain + tarp installation | $350 – $1,000 (small area) + $800 – $1,600 |
| Attic insulation replacement | $1,000 – $2,500 |
| Drywall repair (walls and ceiling) | $500 – $1,800 |
| Mold remediation | $2,000 – $6,000 |
| Full flooring replacement | $8,000 – $15,000 |
| Structural repair (beams, subfloor) | $5,000 – $20,000+ |
What drives the price up?
- How long the leak has been there.
- Whether mold has started spreading.
- Damage to wiring or HVAC systems.
- Second-floor leaks (gravity = more mess).
- Improper DIY repairs, like using screw-in tarps. (insurance may walk away).
Quick reminder: Protect Preserve Roofing offers honest quotes, quick action and zero pressure. We show you the real damage, explain every dollar and help you avoid wasting money on band aid fixes.
Why DIY Tarping Could Cost You More Than You Think
It’s just a tarp, right? How hard can it be? That’s what a lot of folks think until they’re paying double to fix what the tarp made worse.
The “quick fix” that backfires
Many homeowners try to slap a tarp over the roof themselves. They grab a ladder, some nails or screws and go to war with the wind. Here’s what usually happens:
- They nail the tarp directly into the roof deck.
- The tarp flaps loose in the next storm.
- Water still gets in and now so do mold and rot.
- Insurance sees the mess and says, “No thanks.”
The hidden costs of “free”
DIY tarp jobs often lead to:
- More leaks from poorly secured corners.
- Structural damage from water seeping under tarp holes.
- Expensive interior repairs insurance won’t touch.
- Roof replacements that could’ve been avoided.
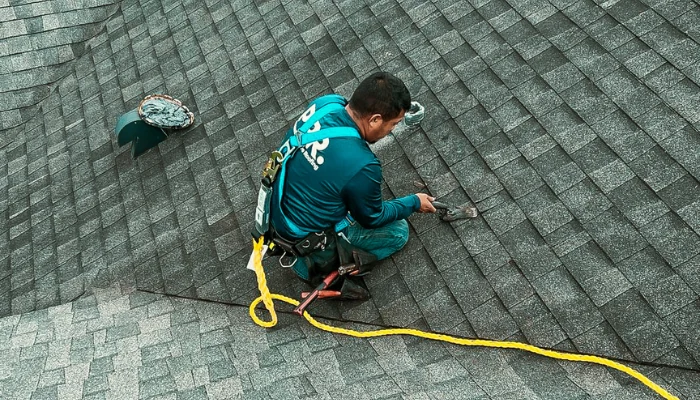
What experts do differently
At Protect Preserve Roofing, we use:
- Weighted sandbags (no screws, no nails).
- Industrial-grade tarps designed for wind resistance.
- Trained crews who secure coverage fast.
- Safe installation with zero added risk to your roof or insurance claim.
How to Prevent Future Roof Water Damage
Let’s be honest: most leaks don’t come out of nowhere. They build up over time and they usually come with warning signs. The key is knowing what to do and doing it before things get ugly.
Regular maintenance beats
Think of your roof like your truck: ignore it long enough and it’ll fail when you least expect it. A simple check-up saves a fortune. So, here’s what pros do to keep water damage away:
- Inspect the roof at least twice a year and especially after storms.
- Clear out gutters and downspouts to prevent pooling.
- Look for cracked or missing shingles.
- Check attic ventilation to stop moisture from building up.
- Spot-test for soft wood on fascia and decking edges.
Don’t skip professional inspections
Even if everything looks fine, leaks often start in spots you can’t see under flashing, near roof valleys or around old vents. That’s where Protect Preserve Roofing comes in. We:
- Offer free visual inspections after storms.
- Check what’s under the surface with moisture meters.
- Help you fix small stuff before it turns expensive.
The smart homeowner checklist
Keep this routine every spring and fall:
- Walk the attic and sniff for musty smells.
- Look for light peeking through roof boards.
- Check ceilings for fresh stains.
- Make sure your tarp (if installed) is still secure.
- Call us at the first drip, not the tenth.
Pro tip from Protect Preserve Roofing: Water damage can be prevented. You just need the right partner and the right timing. Always stay ahead of the storm.
Conclusion: Choose Trusted Experts in Leak Protection
A small leak doesn’t wait. It spreads. It ruins ceilings, warps walls, grows mold and wrecks the structure of your home, all while draining your wallet and patience.
The best move isn’t patching things up alone or waiting to “see if it gets worse, it’s calling someone who knows exactly how bad it can get and how to stop it before it does. At Protect Preserve Roofing, we:
- Respond fast with safe tarp installations (no nails, no extra damage).
- Help prevent insurance headaches by doing things by the book.
- Fix the root cause of the leak, not just the symptoms.
- Educate you at every step, without jargon or pressure.
- Treat your home like it’s our own because for many of our crew, it could be.
You don’t need to guess anymore, you need a crew that shows up. Call us to protect your home. We’re your first line of defense when it counts for your roof. You can also get a quick estimate to prevent or repair damage, or even schedule a free visit to your roof.
We are the experts in roof leak protection, tarp services, and repair guidance you need.


Leave a Reply