


How to repair a shingle roof leak may seem like a straightforward DIY task, but even a small mistake can lead to costly water damage, mold growth, or structural decay.
According to the National Roofing Contractors Association (NRCA), over 70% of residential roof leaks originate from shingle-related issues, especially around chimneys, flashing and roof valleys. The good news? You don’t need to be a roofer to fix it, if you know exactly what to look for and how to act quickly.
That’s why in this guide, you’ll learn step by step how to identify the real source of the leak, how to fix it safely and how to prevent it from ever coming back. Whether you’re dealing with a missing shingle, a cracked seal or improperly installed flashing, this walkthrough will help you handle the repair confidently when you can do it or hiring the right professional for the job as Protect Preserve Roofing.
Let’s begin with the signs that your shingle roof might be leaking and how to spot them before it’s too late.
Table of contents
How to Identify a Shingle Roof Leak?
Let’s get to the point: your job is to spot the warning signs early, before the leak gets worse and the repair turns into a full-blown roof replacement. Here’s what to look for:
- Water stains on your ceiling or walls: You notice a brown spot on your ceiling. That’s not paint, it’s water and it’s coming from above. This is one of the first and clearest signs that water has made its way past your shingles and underlayment.
- Drips, moisture or mold in the attic: If you see any wet insulation, feel humidity where it shouldn’t be or smell something like a wet towel left in the gym bag… that’s mold and it often grows where the leak is hiding.
- Shingles that are lifted, cracked or missing: From the ground, look at your roof. You don’t need drone footage, just good eyes to see shingles curled up at the edges, missing a patch or two or random dark areas. These are red flags.
- Nails popping or rusted flashing: Flashings are thin pieces of metal that seal your roof’s edges, valleys and vents. If they’re rusted, bent or loose… boom, there’s your entry point.
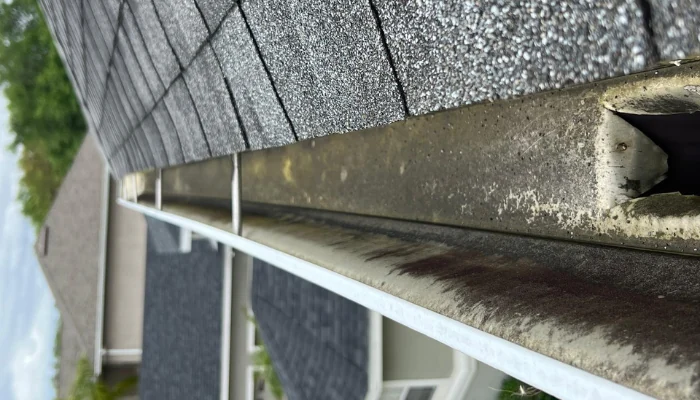
- Gutters full of shingle granules: If your gutter looks like it’s filled with coffee grounds, those aren’t coffee grounds. That’s roofing granule loss. Granules protect shingles from sun damage, when they start disappearing, it means your your shingles are aging and leaking comes next.
Pro tip from Protect Preserve Roofing: If you catch these clues early, a tarp can buy you time, but don’t DIY it the wrong way. Never nail or screw a tarp to your roof, that can void insurance coverage and make the damage worse.
Where Shingle Roofs Typically Leak?
Water doesn’t behave the way you’d expect. It travels, finds the path of least resistance, creeps sideways and shows up in places that make you scratch your head. So, here’s where leaks usually start on a shingle roof and where you should look before know how to repair a shingle roof leak:
- Roof valleys: These are the areas where two roof slopes meet. If the sealing is weak or deteriorated, you’ve got a leak waiting to happen. Check for any visible cracks, lifted shingles or exposed nails along the valley line.
- Chimneys and flashings: Flashings are thin pieces of metal that seal roof edges and transitions. Around chimneys, they get hit hard by wind, water and temperature changes. Check for rusted, bent or separated flashing.
- Vents and pipe boots: Roof vents, plumbing stacks and pipe boots all break the roof’s surface. If not sealed correctly, they turn into leaky trouble spots. Check for deteriorated rubber boots, cracked caulking or loose nails around the base.
- Transitions in roof pitch: If your roof changes slope or shape, that transition needs extra care. Flashings should overlap and underlayment needs to be layered correctly. Check for irregular seams, exposed nail lines or lifted shingles at the transition.
- Skylights and solar panels: These modern features are great, until they leak. Most leaks around skylights or panels come from bad sealing or stress around the mounting brackets. Check for cracked sealant, pooling water around the base or gaps under flashing.
Pro tip from Protect Preserve Roofing: Don’t assume the leak is directly above the stain. Head to the attic with a flashlight and follow the trail. Water runs along rafters and joists before dripping into view or call the pros that can pinpoint the exact location and explain the best fix.
Tools and Materials for How to Repair a Shingle Roof Leak
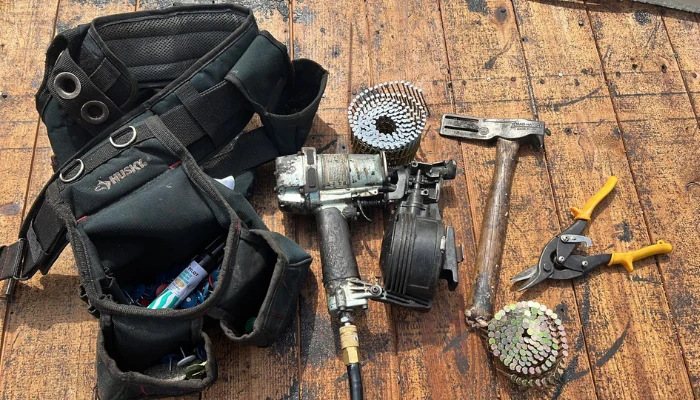
Let’s get real: you can’t fix a roof leak with hope and duct tape, you need the right gear. So on “how to repair a shingle roof leak” here’s the checklist of what to bring:
- Ladder – Must be sturdy and stable. No folding chairs or balancing acts, please.
- Flat pry bar – To lift shingles gently and remove nails without breaking stuff.
- Hammer – You’ll need it to remove nails and drive in new ones.
- Utility knife – For cutting shingles cleanly (no kitchen knives allowed).
- Putty knife – Spreads roof sealant evenly, like butter on toast.
- Gloves – To avoid shredded hands.
- Non-slip shoes or boots – Roofs aren’t friendly when wet.
- Safety glasses – Especially when prying or hammering.
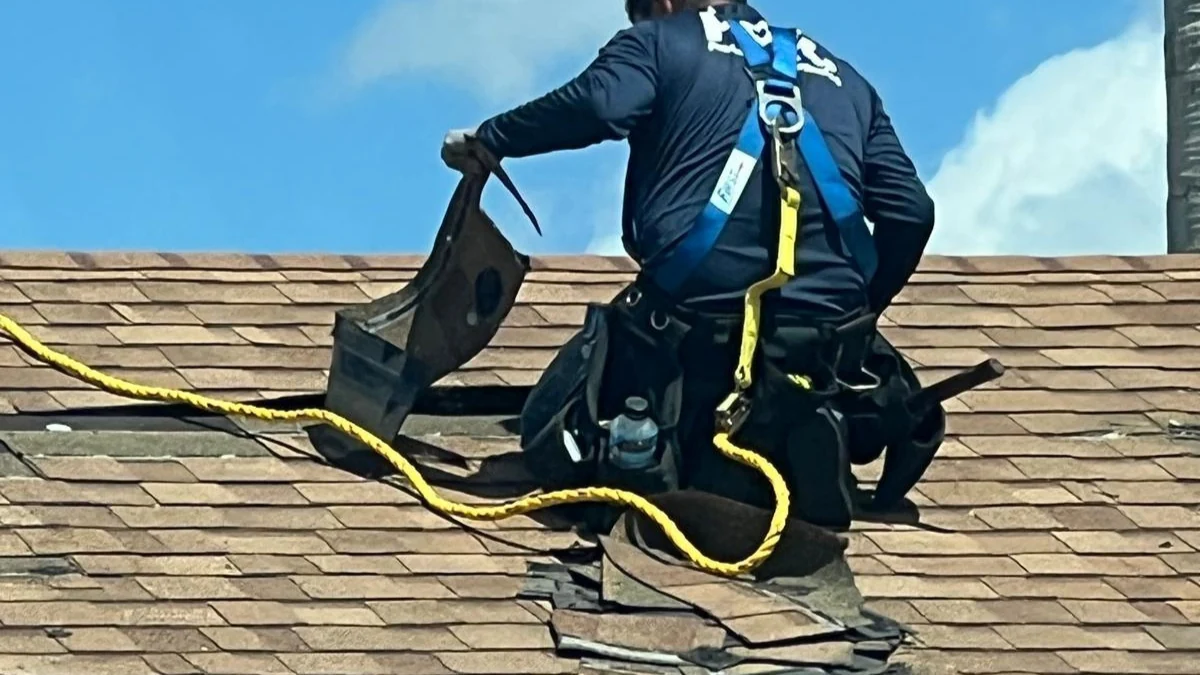
- Roof harness (optional but smart) – Especially on steep pitches. Your knees and spine will thank you.
- Replacement shingles – Match the style and color as close as you can.
- Roofing nails – Use 1 ¼ inch galvanized nails. Anything smaller is a joke.
- Roofing sealant – To secure loose tabs and seal edges.
Pro tip from Protect Preserve Roofing: Never nail or screw through a tarp directly into your roof, unless the pitch is so steep or the damage so severe that nothing else holds. Doing it wrong can void your insurance, let in more water and cost way more to fix.
How to Repair a Shingle Roof Leak: Step-by-Step
This guide walks you through how to repair a shingle roof leak safely, whether you’re dealing with a loose tab, a cracked shingle or one that’s just flat-out missing.
- Step 1: Prep the work area. Set up your ladder on solid ground, clear the area of debris, leaves and loose granules and lay your tools out where you can reach them – climbing back down for a hammer is a pain (ask us how we know).
- Step 2: Lift the shingles around the damaged one. Use your pry bar to gently lift the tabs of the shingles directly above the damaged one, then slide the bar under the damaged shingle and pop out the nails holding it in place. After this, pull the shingle out carefully so you don’t tear the underlayment underneath.
- Step 3: Slide in the new shingle. Line up the replacement shingle with the existing rows and make sure it matches the color and thickness (close enough is fine).
- Step 4: Nail it down. Nail through the top of the shingle where the next layer will cover it. Use four nails, evenly spaced and don’t overdrive the nails, just snug enough to hold it flat. Remember, this step is not for securing a tarp.
- Step 5: Seal the edges. Lift the tabs above and add a small bead of roofing sealant underneath, press the tabs down so the sealant sticks and, if needed, apply a bit of sealant over the nail heads too.
Alternate fix
If the shingle is cracked, but still in place, here’s a shortcut fix:
- Slide sealant under the crack.
- Press the shingle flat.
- Add a thin layer of sealant on top and smooth it with a putty knife.
- For extra camo, sprinkle some shingle granules from your gutter over the wet sealant. Looks better and works great.
What not to do
First, don’t nail over a damaged shingle and call it fixed, that just hides the problem. Second, don’t try to patch multiple broken shingles with one giant blob of tar and don’t walk all over your roof “just to inspect.” Step carefully, walk like you’re sneaking past a sleeping bear.
How to Repair a Leaking Asphalt Shingle Roof
You found the leak, you’ve got your tools and now here’s the part most people mess up: They fix it wrong and make it worse, even with the best intentions, a poorly done repair can trap water, damage the structure and void your insurance.
Here’s how to repair a leaking asphalt shingle roof the right way without turning a small job into a roof replacement nightmare.
- Using the wrong materials: Don’t slap on just any sealant or “roof patch goo” you find at the hardware store. Use roofing sealant or roofing cement only. You also need to read the label. If it doesn’t say “for asphalt shingles,” don’t use it and avoid anything that stays sticky or soft. It needs to cure tight.
- Blocking the water flow: Never put roofing cement above a shingle tab and never block a valley or divert water sideways. You need to always tuck new shingles under the row above, so water flows smoothly down.
- Overnailing, undersealing: One well-placed nail is worth more than five crooked ones, that’s why you need four nails per shingle, unless it’s a high-wind zone (then use six), don’t drive nails through the face of a shingle and always apply a bead of sealant under the tabs to keep wind from lifting them – again, we are not talking about a tarp.
- Fixing the wrong spot: This one hurts the most. You patch the drip above the ceiling, but the water was entering 3 feet uphill. So, the leak continues and now you’re fixing drywall too. Always trace the leak to its entry point, not just where the water shows up.
Average Cost to Repair a Shingle Roof Leak
Leaks don’t wait and neither do repair bills. Below is a side-by-side cost comparison to help you decide whether to handle it yourself or call in a pro:
| Repair Type / Item | DIY Estimated Cost (USD) | Professional Estimated Cost (USD) |
| Replacement shingles (per bundle) | $25 – $60 | Included in quote |
| Roofing nails (galvanized) | $8 – $15 | Included |
| Roofing cement or sealant | $6 – $20 | Included |
| Pry bar & utility knife | $15 – $30 | Included |
| Safety gear (gloves, shoes) | $30 – $80 | Provided by crew |
| Ladder (if not owned) | $120 – $300 | Not needed |
| Minor leak (1–3 shingles) | — | $150 – $350 |
| Moderate repair (valley/vent work) | — | $400 – $850 |
| Emergency tarp installation | — | $800 – $1,600 |
| Full inspection & patching | — | $600 – $1,200 |
| Total (Basic Job) | $100 – $250 | $150 – $1,600+ |
As you can see, DIY makes sense when you can clearly see the source of the leak, the damage is small (1–2 shingles) or you’re confident on a ladder and have the right tools. However, you need to call a pro when the leak is near flashing, chimneys, valleys or vents, can’t locate the exact source, the roof is steep, high, or feels unsafe and you want insurance to back the fix (DIY jobs may hurt your claim).

Common Mistakes to Avoid
A lot of DIYers make mistakes that turn a small leak into a big, expensive mess. Some of them even void their insurance without knowing it. Here’s what you need to watch out for:
- Nailing through the tarp. Grab a tarp, nail it down, done. Wrong. Every nail you put through the roof is another leak waiting to happen and most insurers reject claims when they see you made the damage worse.
- Fixing the wrong area. That ceiling stain? The real entry point might be 3 feet uphill, near a vent or valley. So, patching the wrong spot won’t stop the leak, it just hides it… temporarily.
- Using household materials. No, silicone caulk from your bathroom drawer won’t cut it. Neither will duct tape or painter’s putty. These materials aren’t made to handle sun, rain or wind. Use roofing sealant, roofing cement and proper asphalt shingles.
- Overlapping shingles the wrong way. Shingles work like fish scales, each one sheds water down to the next. Get the order wrong and you’re creating a dam. You need to always tuck new shingles under the upper row and never cover edges horizontally or upside-down.
- Leaving tools or nails on the roof. Sounds silly, but it happens all the time and one loose nail or hammer left on the roof can slide off and damage a car or worse. Clean up everything before you come down.
Pro tip: Take your time. Follow clear steps and when something feels risky or beyond your experience, don’t wing it, Protect Preserve Roofing has helped thousands of homeowners avoid exactly these issues. We’re just a call away.
Preventive Maintenance Tips
The best way to avoid future headaches (and bills)? Stay ahead of the leaks before they start and here’s how:
- Inspect your roof twice a year: Look for lifted shingles, missing tabs or anything that just looks “off.” Pay extra attention after storms, wind gusts or hail.
- Keep gutters clean: Clean out leaves, dirt and gunk every few months. While you’re up there, check that gutters are still properly attached.
- Trim overhanging tree branches: Keep branches at least 6 feet away from the roof. It’s not just about leaves; it’s about damage prevention.
- Check flashings, vents and valleys: Flashings should sit flat and sealed, vents should be snug, with boots in good shape and valleys should be clear of debris and free of granule buildup.
- Watch for granules in the gutters: Gutters full of sandy black material? Time to monitor that section closely and missing granules equals weaker protection from sun and water.
Protect Preserve Roofing’s advice: The best leak is the one you never have to fix and the best way to avoid surprise repairs is a simple checklist, followed once or twice a year.
How to Repair a Shingle Roof Leak: Shingles Blown Off Roof
You walk outside after a storm, look up and yep, a few shingles are missing. Maybe more than a few, so will it leak? Let’s break it down and help you fix it before that small bald spot becomes a full-blown water slide.
Why missing shingles matter
Shingles aren’t just there for looks; they work together like armor. When one’s gone, the underlayment is exposed and even if it looks dry now, rain can sneak in fast.
- One or two missing shingles? You might get lucky for a day or two.
- A patch blown clean off? That’s a leak waiting to happen and it won’t wait long.
Water always finds a way. Wind-driven rain doesn’t need an open hole, just a weak point.
What to check after shingles blow off
Before fixing anything, inspect safely (from the ground or attic first).
- Look for moisture, ceiling stains, or damp insulation inside the house.
- On the roof, check if the underlayment is torn, wrinkled, or exposed.
- Look around vents, chimneys and valleys, missing shingles in these areas are riskier.
How to fix it
- If it’s just 1–3 missing shingles:
- Remove any loose debris or nail fragments.
- Slide replacement shingles under the upper row.
- Nail them in place with roofing nails (not screws, not tacks).
- Seal the tabs with roofing sealant to stop wind uplift.
- If it’s a larger patch:
- Inspect the surrounding shingles. If they’re brittle, curled or cracked, replacing just one row won’t help.
- You may need to remove and replace a full section, including underlayment if exposed.
Quick reminder from Protect Preserve Roofing: One missing shingle seems small, until the water comes in. If you’re unsure how bad it is, we’ll inspect it, explain the risk and guide the right fix. No unnecessary repairs, just what needs to be done.
Conclusion: Hiring Roofing Professionals
Fixing a shingle or sealing a crack feels manageable and for a lot of folks, it is. But the truth is, what works in a YouTube video doesn’t always hold up 15 feet off the ground, in the wind. That’s why you need Protect Preserve Roofing. With us you have:
- Clear communication from day one. No vague answers.
- Real inspections, not quick glances.
- No damage cover-ups. If it’s bad, we’ll say it and back it up with evidence.
- No-nail tarp installations, unless the pitch forces a different approach. Why? Because puncturing the roof adds damage and often voids coverage.
- Fair pricing with a clear scope of work. You know what you’re paying for and why.
Leaks aren’t just annoying, they’re expensive if ignored. However, you don’t need panic, pressure, or overpriced “fixes” to solve them. You need a fast response, an honest inspection and a repair that solves the problem without causing five new ones.
We’ve helped homeowners all over stay dry, save money and keep their insurance intact. Call to action if you’re dealing with a leak or get a quick estimate here. You can also schedule a free visit to your roof.
We’ll tell you what’s really going on and what to do about it.
Frequently Asked Questions (FAQ)
• If the leak was caused by a sudden event (storm, falling tree), it may be covered.
• If the leak developed over time due to lack of maintenance, coverage is unlikely.
• If you delayed repairs, claims can be denied for neglect.
• Shingles are cracked, curling, or missing granules.
• There are multiple leaks.
• The roof is 15–20 years old or older.
If you’re patching over patching, it’s time for a bigger conversation.


Leave a Reply