


How to replace a roof shingle is something every homeowner wonders about at some point, usually after spotting a cracked, curling or missing shingle. According to the National Association of Home Builders, a well-maintained asphalt shingle roof can last up to 30 years, but even a single damaged shingle can lead to leaks, wood rot and costly repairs if ignored.
Many homeowners delay small repairs, thinking it’s “no big deal,” only to end up with water damage, insulation issues or even mold. The truth is, that little patch of damage can quickly snowball into a major expense.
So, in this guide, you’ll learn the safe, step-by-step method to replace a shingle, how much it might cost, common mistakes to avoid and why thousands of homeowners’ trust Protect Preserve Roofing for fast, expert shingle replacement.
If you’ve been putting it off, don’t. A quick repair today could save you from a full roof replacement tomorrow. Let’s get started.
Table of contents
Essential Tools and Materials for Roof Shingle Replacement
Replacing a roof shingle is not just about climbing a ladder and hammering away. Having the right tools and materials ready makes the job faster, safer and more professional. Here’s a clear breakdown of what you’ll need before starting:
- Safety gear (non-negotiable)
- Roof harness – Prevents dangerous falls.
- Work gloves – Protect your hands from cuts and splinters.
- Non-slip boots – Essential for grip on asphalt shingles.
- Safety glasses – Shields your eyes from debris and nails.
- Essential tools
- Hammer or roofing nail gun – A nail gun speeds up the job, but a hammer works for smaller repairs.
- Flat pry bar – To lift old shingles without damaging surrounding ones.
- Utility knife with hook blades – For precise cutting of shingles.
- Tape measure – To ensure accurate cuts and alignment.
- Chalk line – Keeps your shingle rows perfectly straight.
- Core material
- Replacement shingles – Match the type, style, and color of your existing roof.
- Roofing nails – Typically 1¼-inch galvanized roofing nails.
- Roofing sealant or adhesive – Helps secure shingles and seal edges.
- Underlayment patches – For repairing any damaged section beneath the shingle.
- Optional but useful add-ons
- Magnetic sweeper – Picks up stray nails around your property.
- Shingle ripper – Specially designed to slide under and remove nails easily.
- Tool belt – Keeps essentials within reach and avoids constant climbing.
Pro tip from Protect Preserve Roofing: Before you even open your toolbox, check the weather forecast. Working on a wet or windy roof is dangerous and can damage fresh installations.
Safety First: Preparing Yourself and Your Roof for the Job
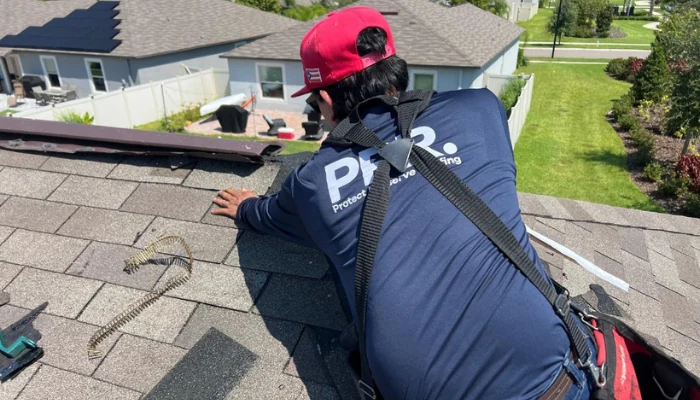
Before you start swinging a hammer or climbing a ladder, your priority should be safety, for both you and your roof. Shingle replacement might look straightforward, but one slip or poor preparation can turn it into a costly, even dangerous, situation.
- Check the weather: Roofing work should always be done on a dry, mild day. Wet shingles become slippery and extreme heat can soften asphalt, making it harder to work with.
- Ideal conditions: Temperatures between 50°F and 85°F with low wind.
- Inspect your roof’s condition: Walk the perimeter of your home and look for potential hazards, like loose shingles that might break under your weight, weak spots or sagging areas in the decking and obstructions like branches or debris.
- Set up your safety gear: Use a roof harness anchored securely, place the ladder on a stable surface, with the base one foot out for every four feet of ladder height and always wear cut-resistant gloves and non-slip boots.
- Prepare your work area: Remove patio furniture, grills, or fragile items from around the house, lay tarps on the ground to catch nails and shingle pieces and keep children and pets inside until the job is done.
- Plan your path: Decide where you’ll climb up, where tools will be kept and how you’ll move across the roof. Staying organized reduces fatigue and risk.
Pro tip from Protect Preserve Roofing: Many roof accidents happen during setup or cleanup. Take as much care when getting on and off the roof as you do while working on it.
How to Replace a Roof Shingle: Step-by-Step Guide
Replacing a damaged shingle isn’t rocket science. However, doing it right ensures your roof stays watertight and avoids further damage. Here’s the process broken down into simple, actionable steps.
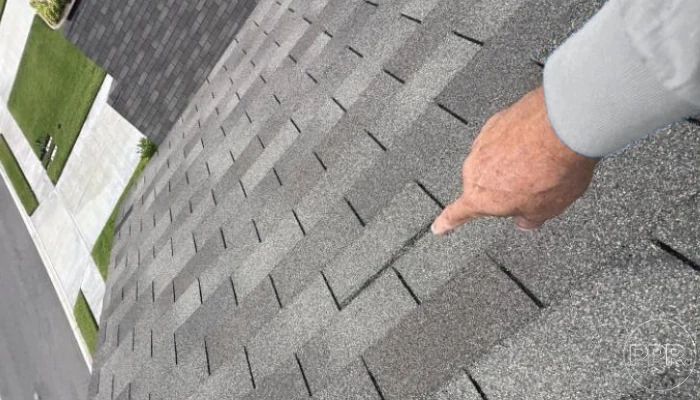
1. Locate and assess the damage: Start by identifying the shingle that needs replacement. Look for cracks, curling edges, missing granules or pieces that have blown away. Sometimes, you might also notice leaks inside your attic pointing to the damaged area.
2. Loosen the surrounding shingles: Use a flat pry bar to gently lift the shingles directly above the damaged one. You’ll see nails holding the damaged shingle in place, these need to come out before you can remove it.
3. Remove the nails: Slide the pry bar under the shingle and lift until the nail pops out and carefully pull the nails out completely without tearing surrounding shingles.
4. Slide out the damaged shingle: Once the nails are out, the damaged shingle should slide down and out easily. If it’s stuck, check for any leftover nails or adhesive.
5. Insert the new shingle: Slide the replacement shingle into place, making sure it aligns perfectly with the existing row. Then nail it down using roofing nails, positioning them about 1 inch above the cutout slots.
6. Seal the shingle: Apply roofing sealant under the edges to ensure it bonds with surrounding shingles. Then press down firmly to help it stick and prevent wind uplift.
7. Double-check your work: Look over the area to confirm nails are flush, shingles are lying flat, and there are no exposed nail heads that could lead to leaks.
Pro tip from Protect Preserve Roofing: If you find that the surrounding shingles are brittle or multiple areas are damaged, it may be smarter, and cheaper in the long run, to replace a larger section instead of just one.

Fixing vs. Replacing: When One Shingle Repair Isn’t Enough
Swapping out a single shingle is a quick fix, but sometimes it’s like putting a band-aid on a deep cut; it doesn’t solve the bigger issue. Knowing how to replace a roof shingle and when to repair a larger section (or the entire roof) can save you from constant headaches and repeated expenses.
When a simple repair works
Repairing one or two shingles is often enough when:
- The rest of the roof is in good shape with no signs of widespread damage.
- The damage is caused by a one-time event, like a fallen branch or a wind gust.
- Shingles around the damaged one are still flexible and intact.
In these cases, the repair is quick, affordable and restores the roof’s protective layer.
When replacement is the smarter move
Even if the damage looks small, replacement may be the better option when:
- Multiple shingles are affected: A storm has damaged large sections.
- Age is a factor: Most asphalt shingle roofs last 15–25 years; if yours is close to that, repairs may not hold for long.
- Water damage is present: If leaks have reached the underlayment or attic, you’re looking at a deeper problem than missing shingles.
- Shingle granules are worn off: Bald patches mean your shingles have lost their weather protection.
Bottom line: If your roof is young and healthy, fix the shingle. If it’s aging, brittle, or showing multiple problem spots, replacing more than just one shingle will protect your home better and for longer.
How Weather and Roof Pitch Affect Shingle Replacement
The success of a roof shingle replacement isn’t just about skill; it’s also about timing and the physical shape of your roof. Both weather conditions and roof pitch can make the job easier, harder, or even unsafe.
Weather conditions: picking the right day
- Dry and mild is best – Shingles need to seal properly, and adhesives work best between 50°F and 85°F.
- Avoid wet or icy surfaces – Moisture makes the roof slippery and dangerous. It can also trap water under shingles, leading to rot.
- Strong winds are a no-go – Wind can rip unsecured shingles out of your hands and make balancing more difficult.
- Extreme heat can be tricky – Shingles may become too soft, making them prone to tearing during installation.
Roof pitch: why slope matters
- Low pitch (flat to 4/12) – Easier to work on and safer for most DIYers but can be more prone to water pooling if not installed correctly.
- Moderate pitch (5/12 to 8/12) – Offers good water runoff and decent safety for pros but may require roof jacks or harnesses for stability.
- Steep pitch (9/12 and above) – Looks great and sheds water quickly but is dangerous to walk on without professional safety gear. Steep roofs almost always require professional replacement.
Little reminder from Protect Preserve Roofing: A steep pitch or tricky weather can mean longer project timelines, higher labor costs due to safety precautions and extra equipment and greater risk of damage if rushed or done in poor conditions. If your roof pitch is steep or the weather is unpredictable, bringing in professionals to ensure the job is done.
How Much Is It to Replace Shingles on a Roof?
Replacing shingles can cost anywhere from $4 to $12 per square foot, depending on the material, labor rates and roof complexity. For a typical 2,000-square-foot roof, that translates to $8,000 to $24,000. Smaller repairs, like replacing a few damaged shingles, often start at $200 to $600, but costs rise quickly if the damage affects the underlayment or structure.
Below is a quick, easy-to-read table so you can see the main cost factors side by side:
| Factor | Low Range | High Range | Notes |
| Asphalt Shingles | $4/sq. ft. | $7/sq. ft. | Most common and budget-friendly option. |
| Architectural Asphalt | $5/sq. ft. | $8/sq. ft. | Thicker, longer lasting and better-looking than standard asphalt. |
| Metal Roofing | $8/sq. ft. | $14/sq. ft. | Highly durable but requires specialized installation. |
| Tile or Slate | $12/sq. ft. | $20+/sq. ft. | Premium look and lifespan, but heavy and expensive. |
| Labor Costs | $2,000 | $7,000+ | Based on roof size, pitch and accessibility. |
| Tarp Installation | $800 | $1,600 | Temporary emergency protection. |
| Permits & Disposal | $200 | $1,000 | Varies by local regulations. |
DIY or Professional Help? Choosing the Right Approach
How to replace a roof shingle by yourself might look like a straightforward weekend project on YouTube. However, the reality on your own roof can be very different. The decision between DIY and hiring a professional often comes down to safety, skill and long-term value.
So, DIY might work for:
- Minor repairs – Replacing one or two shingles in an easy-to-reach area.
- Basic tools on hand – You already have a hammer, roofing nails, pry bar and safety equipment.
- Solid roof structure – No underlying damage to decking or underlayment.
If your repair is small and you’re comfortable on a ladder, DIY can save you $200–$600 in labor costs for minor fixes. Just remember, a mistake here can cost more in the long run than hiring a pro in the first place.
You need to call a professional when:
- High or steep roof pitch – Increased fall risk and difficulty securing yourself safely.
- Structural damage – If decking, flashing, or underlayment needs work.
- Large-scale replacement – Anything beyond a few shingles should be done by experienced roofers.
- Insurance claims – Professionals know how to document work for coverage eligibility.
A professional roofer brings not just skill, but also the right tools, crew and materials to finish the job faster and safer. They also follow manufacturer guidelines, which helps maintain your shingle warranty – something a DIY job might void.
Cost perspective
While DIY may seem cheaper upfront, professional work often delivers better durability and fewer future problems. On average:
- DIY small repair: $50–$150 for materials.
- Pro small repair: $200–$600.
- Full professional replacement: $8,000–$24,000, depending on size and materials.
Little reminder: If your repair involves anything beyond simple shingle replacement, hiring a pro like Protect Preserve Roofing is usually worth the investment in safety, time and peace of mind.
Mistakes to Avoid When Replacing Roof Shingles
Even a small error in shingle replacement can lead to costly leaks, structural damage or the need for a full roof redo sooner than expected. Whether you’re a weekend DIY warrior or hiring a crew, knowing how to replace a roof shingle and the most common mistakes will help you always. Let’s break it down:
- Not matching the existing shingles: Using a shingle that’s slightly different in color, size or style might seem harmless, but it can stand out like a sore thumb and reduce curb appeal. Worse, mismatched materials may not lock together correctly, creating gaps for water and wind.
- Improper nailing:
- Too few nails – Can cause shingles to lift in high winds.
- Nails placed too high – Misses the nail strip and weakens hold.
- Overdriven nails – Breaks through the shingle, leaving it prone to tearing.
- Skipping underlayment repairs: If the underlayment is torn or deteriorated, replacing shingles on top of it is like painting over rust. Always check and repair underlayment before installing new shingles.
- Ignoring roof pitch safety: Working on steep slopes without proper harnesses or footwear can lead to serious injury. Protec Preserve Roofing always emphasizes OSHA-compliant safety practices and homeowners should too.
- Working in the wrong weather: Shingles need the right conditions to seal and adhere properly. Extreme heat can make them soft and prone to damage during handling, while cold weather can make them brittle and harder to nail without cracking.
- Forgetting to seal edges and flashing: Neglecting to re-seal flashing or shingle edges is one of the fastest ways for water to get under your roof. This is especially important around chimneys, vents and valleys.
- Not checking warranty requirements: Some shingle warranties require specific installation methods, and a misstep could void your coverage.
Preventive Maintenance to Extend Your Roof’s Life
Replacing roof shingles is costly, so the smartest move is to delay that expense for as long as possible. With a few consistent habits, you can keep your roof strong, safe and looking good for years. Let’s show you how:
- Schedule annual roof inspections: Have a professional like Protect Preserve Roofing inspect it at least once a year. They’ll spot loose shingles, cracked flashing and early signs of water intrusion before they become expensive headaches.
- Keep gutters clean and functional: Clogged gutters let water back up under shingles, leading to rot and leaks. Clear them at least twice a year, more often if you have overhanging trees. Consider installing gutter guards to reduce maintenance.
- Trim overhanging branches: Branches rubbing against shingles can wear away the protective granules and let water in. In storms, they can even rip shingles clean off. Keeping them trimmed reduces both wear and the risk of sudden damage.
- Address minor damage immediately: A single missing or cracked shingle might seem harmless, but it’s an open invitation for water. Small repairs now prevent large repairs later.
- Check for proper attic ventilation: Poor airflow can trap heat and moisture, which weakens shingles from underneath. Make sure your attic has adequate vents to keep the roof deck dry and cool.
- Monitor and replace caulking around flashing: Over time, the caulk sealing your flashing can crack or shrink. Check it regularly and refresh as needed to maintain a watertight seal.
- Avoid walking on your roof when possible: Every step can scuff shingles or knock granules loose. If you must go up, use soft-soled shoes and tread carefully.
Little reminder: A little preventive care now can save you thousands in future repairs or replacements. With Protect Preserve Roofing handling inspections and upkeep, you’ll extend the life of your shingles and protect the investment in your home.
Conclusion: Why Protect Preserve Roofing Is the Right Choice for Shingle Work
When it comes to repairing or how to replace a roof shingle, you want more than a quick fix, you want the job done right, with lasting results and zero headaches. That’s exactly what Protect Preserve Roofing delivers.
We combine years of hands-on experience with cutting-edge tools and a commitment to protecting your home as if it were our own. From emergency tarp installations that prevent further water damage to precise shingle replacements that restore your roof’s strength and curb appeal, every service is backed by proven expertise.
Whether it’s a single shingle repair or a full roof replacement, we bring the same level of precision, reliability, and respect to every project. And with our strong local reputation, you can trust that your roof is in skilled hands.
Don’t leave your biggest investment exposed to risk. Call us today for expert shingle repair and replacement services that stand the test of time. You can also schedule a free visit to your roof or get a quick estimate.
Whether you’re staring at missing shingles today or planning ahead, now is the time to act.
Frequently Asked Questions About Roof Shingle Replacement
Yes. If only one or a few shingles are damaged, you can replace them individually. However, if the damage covers a large area or the roof is aging, a full replacement may be more cost-effective and longer-lasting.
You’ll need a pry bar, roofing nails, a hammer, replacement shingles, and roofing cement. For safety, use a harness and ladder stabilizers.
Costs range from $150 to $500 for small repairs and $8,000–$18,000 for full replacements, depending on materials, roof size, and labor rates.
It can be, if you use proper safety gear and have roofing experience. However, for steep or complex roofs, hiring a professional like Protect Preserve Roofing is safer and often more efficient.
Can I replace just one damaged shingle?
Yes. If only one or a few shingles are damaged, you can replace them individually. However, if the damage covers a large area or the roof is aging, a full replacement may be more cost-effective and longer-lasting.
What tools do I need to replace a roof shingle?
You’ll need a pry bar, roofing nails, a hammer, replacement shingles, and roofing cement. For safety, use a harness and ladder stabilizers.
How much does it cost to replace shingles on a roof?
Costs range from $150 to $500 for small repairs and $8,000–$18,000 for full replacements, depending on materials, roof size, and labor.
Is it safe to replace roof shingles myself?
It can be, if you use proper safety gear and have roofing experience. However, for steep or complex roofs, hiring a professional like Protect Preserve Roofing is safer and often more efficient.


Leave a Reply