


How to tarp a roof may seem like a quick fix after a storm, but done wrong, it can actually cause more damage than protection.
According to FEMA – Operation Blue Roof, there are low- or no-cost resources to repair your roof.
However, these are repairs that, depending on the damage, have no effect. A poorly installed tarp can trap moisture, create structural hazards, and leave your home vulnerable to costly repairs.
Have you ever faced a leaking roof and felt overwhelmed about what to do next? You’re not alone. Every year, thousands of homeowners find themselves urgently searching for ways to protect their homes after storm damage – often with little guidance on how to do it safely.
The good news? You don’t have to face this challenge alone. With the right tips from professionals who handle this every day, you can tarp your roof quickly, safely and effectively, avoiding common mistakes that put your home at risk.
In this guide, you’ll learn how to tarp a roof the right way, how to avoid hidden dangers and why choosing trusted experts like Protect Preserve Roofing could save you time, money and stress in the long run.
Table of contents
When and Why You Should Tarp a Roof
So, your roof took a beating. Maybe it was a nasty storm, flying branches, or one of those “it’ll never happen to me” moments. Whatever the case, you’re standing there, looking up, wondering what to do next, right?
Well, we are here to help you with this situation and how to prevent it in the future.
Why you shouldn’t wait
Leaving your roof exposed, even for a day, is like leaving your front door wide open during a rainstorm. Water finds a way in. Fast. And when it does, it wrecks ceilings, walls, and everything you thought was safe inside.
When it’s time to grab a tarp
- Lost shingles? Grab a tarp.
- Tree branch punched a hole? Grab a tarp.
- Water stains on your ceiling after the rain? You guessed it, right? Grab a tarp.
- Waiting for pros but the forecast says more rain? You know what to do.
Quick action is key. Tarping your roof buys you time and protects your wallet. But you’ve got to do it right or you’ll be back where you started, only wetter.
Ready to get to work? First, let’s talk about what you actually need to do the job right.
Step-by-Step Guide: How to Tarp a Roof Safely
Let’s get real for just a second. Climbing on a roof isn’t for everyone and you know it. If you’re not feeling 100% safe, call the pros – like us, Protect Preserve Roofing. But if you’re ready to handle it yourself, follow these steps to avoid turning a bad day into a worse one.
- Step 1 – Check the damage… without breaking your neck: Look, don’t leap, okay? Do a quick inspection from the ground if possible. Binoculars help. If it looks safe, climb up carefully. Don’t walk on damaged areas. They might not hold your weight.
- Step 2 – Measure the damaged area: You don’t need to cover the entire roof, just the damaged section plus a few extra feet on all sides. Grab your tape measure and write it down. No guessing. No “that looks about right”.
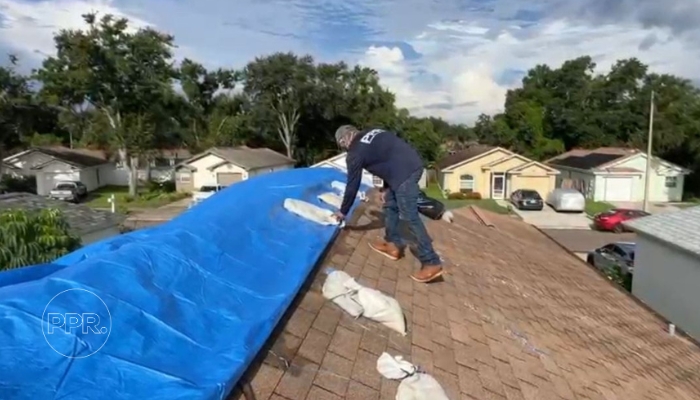
- Step 3 – Unroll the tarp: Remember that “bigger is better” in this case. Spread your tarp over the damaged area, making sure it hangs over the ridge if possible. That helps keep water from running under it. Smooth it out to avoid air pockets that could flap and rip in the wind.
- Step 4 – Secure it like you mean it: Place your 2×4 boards along the edges of the tarp. Roll the tarp’s edge around the boards. Don’t nail or screw directly to the roof, as this may cause problems with the insurance company as well as making more holes and having more problems with water.
- Step 5 – Double-check everything: Give the tarp a tug. If it shifts easily, secure it again. Check that it’s tight, smooth and covering the entire damage area. Water loves to find gaps, you’ve got to stay one step ahead.
Feeling like a roofing pro yet? Don’t get too comfortable because mistakes happen fast. Up next, let’s cover the traps you need to avoid and how to adjust based on where you live.
Avoiding Common Mistakes and Regional Tarping Tips
Let’s be honest, tarping looks easier than it is. A lot of homeowners rush the job and end up with more problems than they started with. Here’s what to avoid:
- Going too small: If your tarp doesn’t fully cover the damage, water will find its way in.
- Nailing through the tarp: Every nail hole is another chance for water to sneak inside. Don’t nail.
- Loose tarping: If the wind catches your tarp like a sail, it won’t last the night.
- Covering only part of the slope: Water flows downhill. If you don’t cover all the way over the ridge or past the leak, you’re wasting your time.
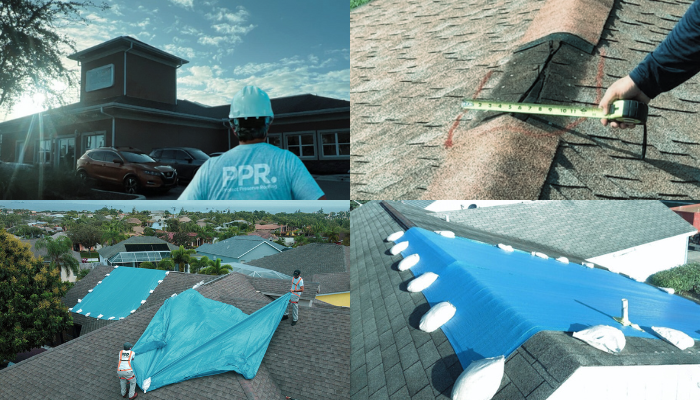
Pro tip: Always roll the tarp edge around a board before securing it. This keeps the tarp tight and prevents tearing.
Tarping tips based on where you live
Not all storms hit the same way. Your region plays a big role in how you should tarp your roof.
- Live in a hurricane zone?
Use extra-long tarps that reach over the roof ridge. Remember to secure every edge with 2x4s to keep wind from getting underneath.
- Get a lot of snow?
Avoid creating pockets where snow and ice can build up. Use a thicker tarp that won’t tear under weight.
- High wind areas?
Double up on securing boards. Overlap tarps if needed, securing each layer.

Pro tip: If you’re not sure what works best in your area, give Protect Preserve Roofing a quick call. We know what works right here because we’ve done it hundreds of times.
DIY vs. Professional Roof Tarping: Making the Right Choice

Look, we get it. You’re thinking “How hard can it be?”
But here’s the thing, roof tarping can go wrong fast – really fast – if you don’t know what you’re doing. Sometimes it’s worth handling it yourself, other times… not so much.
When DIY makes sense
- The damage is small and easy to reach.
- You feel safe climbing and working on your roof.
- You have all the right materials and a second set of hands to help.
When you should call the pros
- The roof is steep, slippery, or unsafe.
- You’re dealing with major damage or multiple areas.
- You don’t have the right tools or enough experience.
- You want the job done faster and safer.
So… do you risk it yourself or bring in the experts? Here’s the cost vs. benefit laid out in black and white, no sugarcoating:
| Factor | DIY Tarping | Professional Tarping |
|---|---|---|
| 1. Estimated Cost | $50 – $150 (if you already have tools) | $800 – $1,600 (depending on roof size & damage) |
| 2. Safety | Risk of falls or injury | 100% safe for you – let the pros handle it |
| 3. Time to Complete | 1 – 3 hours (if you know what you’re doing) | 30 minutes – 1 hour (expert team) |
| 4. Durability | Temporary fix, might need rework | Professionally secured, weather-resistant |
| 5. Peace of Mind | Uncertain – hoping it holds | Guaranteed protection and less stress |
Not sure what’s best? Contact Protect Preserve Roofing today. We’ll give you an honest recommendation and handle the hard work so you don’t have to.
To help you further, the next section covers some common questions we’ve already discussed. You can also always get in touch with us directly.
Community Q&A: Real Questions, Expert Answers
We know you’ve got questions because we’ve heard them all. Here are the most common roof tarping questions homeowners ask online, answered by the experts at Protect Preserve Roofing.
1. How long can I leave a tarp on my roof?
Temporary tarps are designed to last 30 to 90 days, depending on the weather (like in the sun). But here’s the problem: the longer you leave it, the greater the risk of water getting in. If weeks are turning into months, it’s time to make real repairs.
2. Can I cover a roof with canvas without nails?
Technically, yes. You could use ropes or sandbags, but that’s risky business – and not a safe action, like Tom Cruise.
Without securing the tarp with boards and fasteners, it won’t last long in wind or rain. Our advice? Secure it properly or call the pros to do it right.
3. What size tarp do I need?
Always go bigger than the damage. Add at least 3 to 5 feet on all sides to make sure you fully cover the area and can secure it properly.
Still not sure? Give us a call. We’ll size it up for you.
4. Do blue tarps really work?
Yes, if they’re heavy-duty. Those thin, cheap ones? Not so much.
Look for reinforced tarps designed for roofing. They resist tearing and hold up better in bad weather.
Have more questions? We’ve got answers. Contact Protect Preserve Roofing today and talk to real experts who actually do this every day.
Conclusion: Why You Should Trust Protect Preserve Roofing to Handle It Right
Let’s be honest, tarping your roof is risky. One wrong step and you could end up with more damage or worse, a trip to the ER. Why gamble with your safety or your home?
At Protect Preserve Roofing, we handle roof tarping every single day. We know the right materials. We know the right techniques. And most importantly, we know how to keep your home safe without adding stress to your life.
What you get when you call us
- Fast response: We show up when you need us most before the next storm hits.
- Professional installation: No loose edges, no second-guessing, no half-baked solutions.
- Safety first: You stay on the ground while our trained, insured team handles the danger.
- Long-term protection: Our work holds up, giving you the time you need for permanent repairs.
So, why risk doing it twice, when you can do it right the first time?
Contact Protect Preserve Roofing today, just click here to get an instant roof estimate.
Let our experts secure your home fast, safe, and stress-free.


Leave a Reply